Make sure to join my list for Weekly Tips and Recipes to Your Inbox
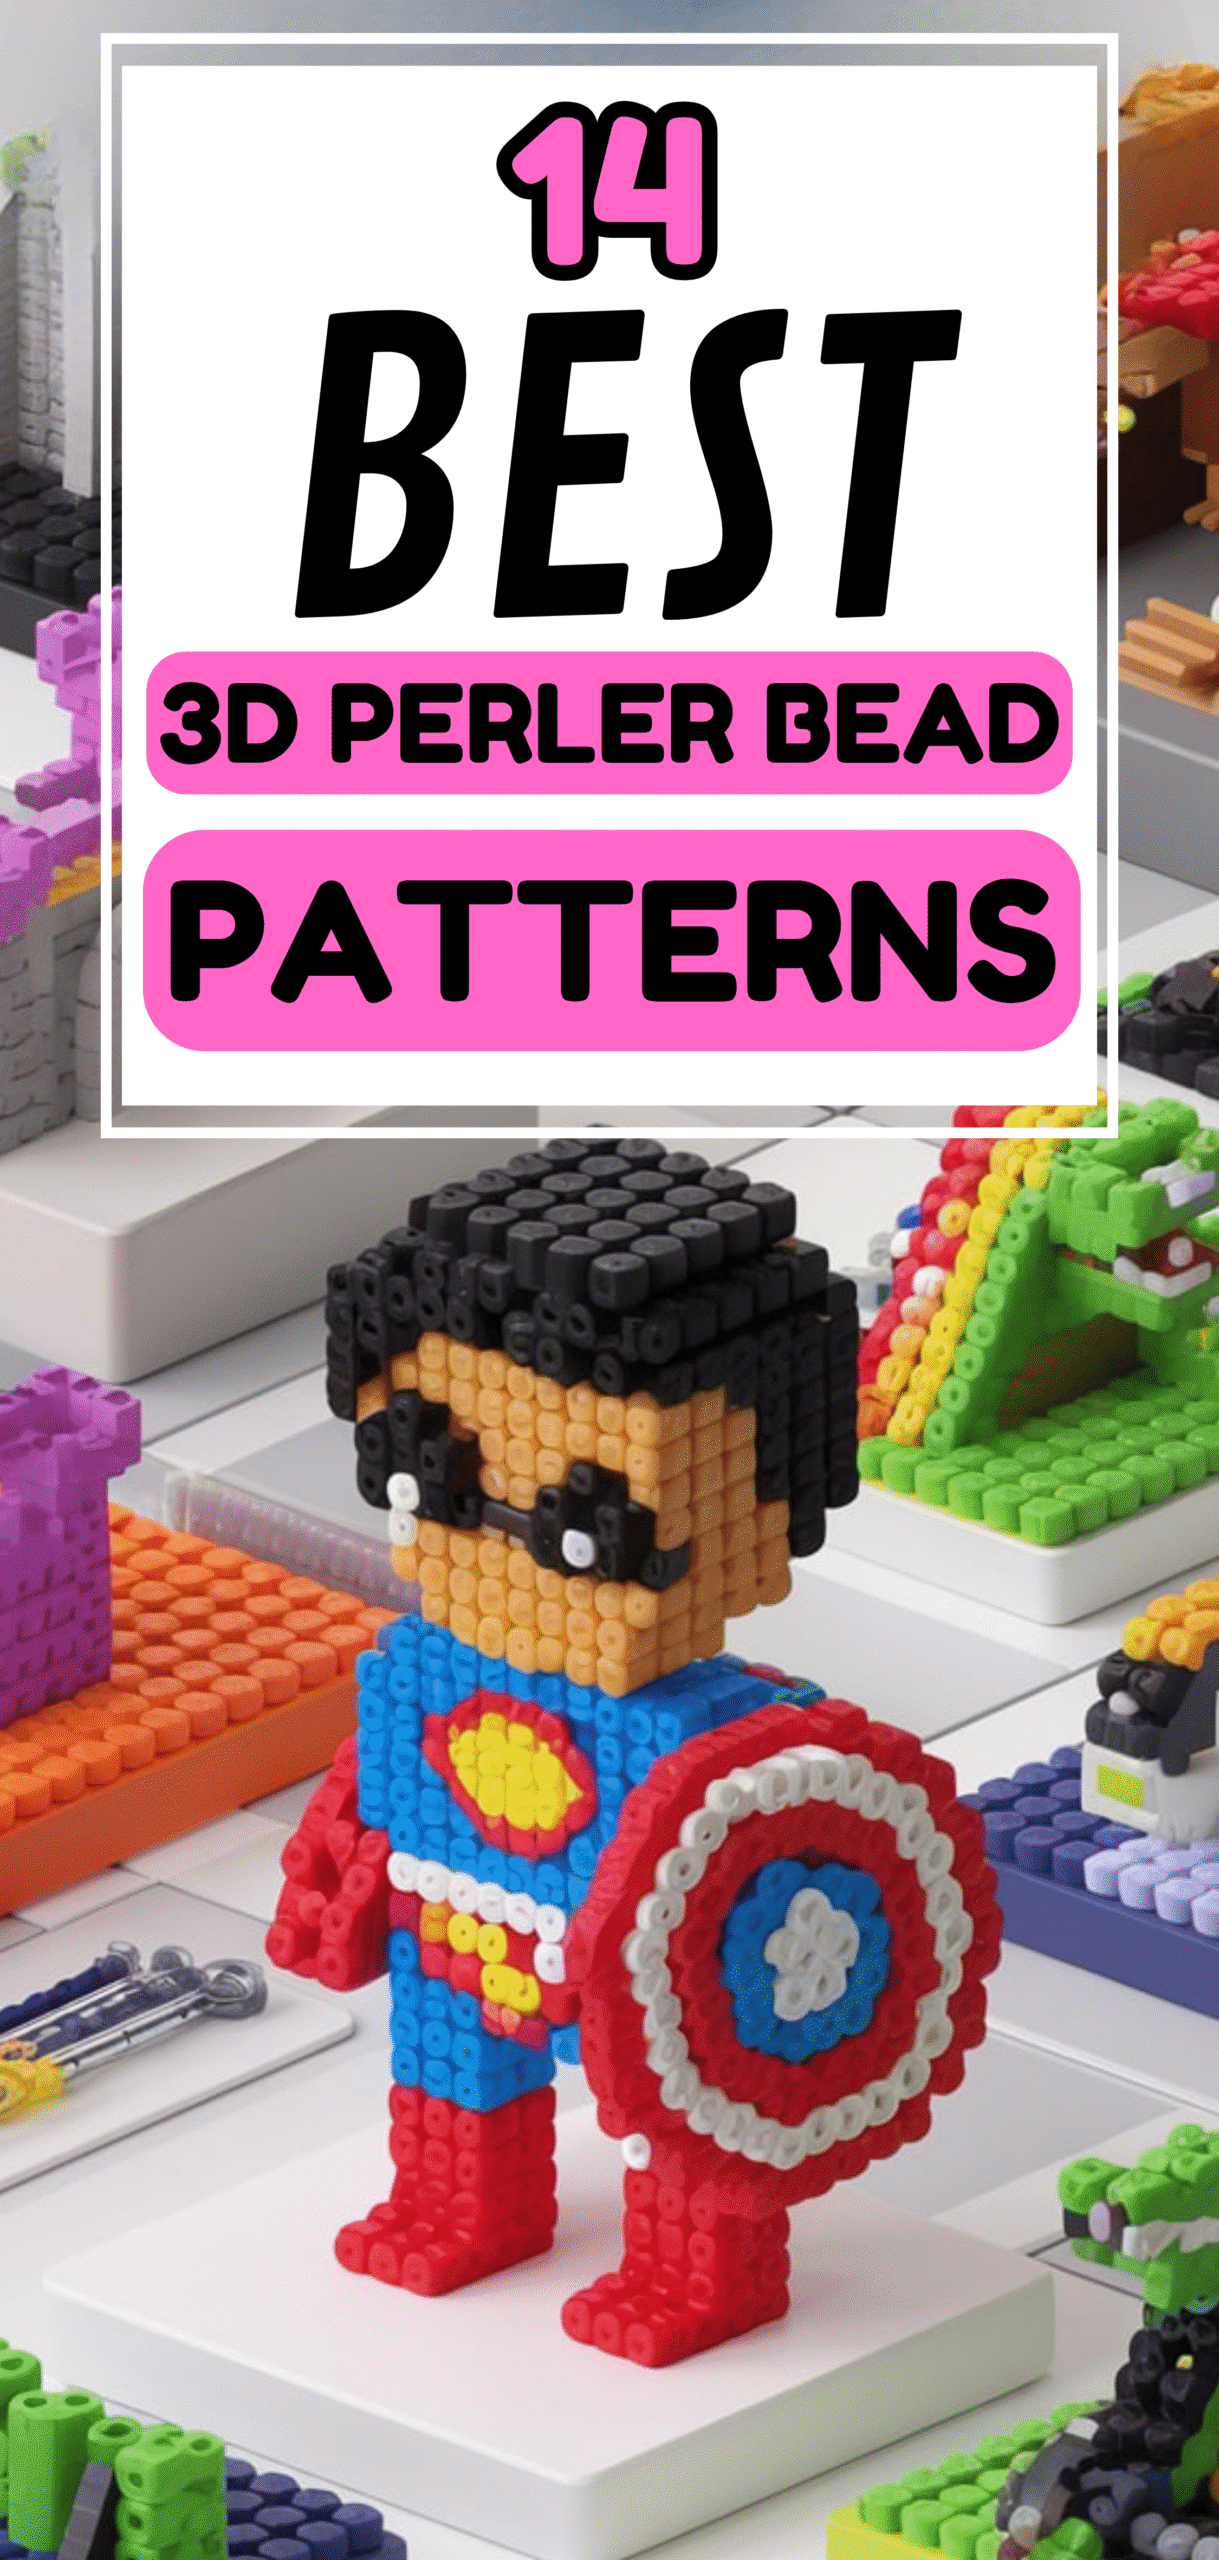
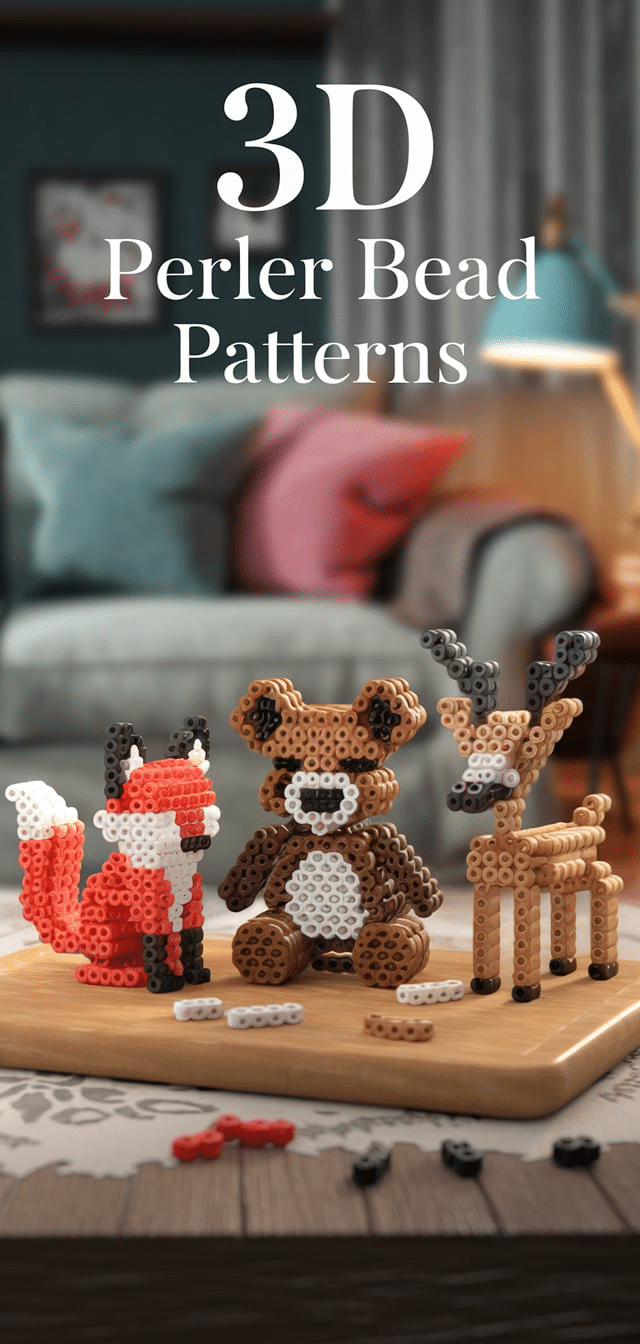
14 Best 3D Perler Bead Patterns
If you’ve followed my blog for a while, you know I’m always trying out new hobbies. From crochet to embroidery, and even clay projects, if it looks fun, I’ll probably give it a go.
Lately? I’ve been completely captivated by 3D Perler Bead figures, magnets, and jewelry. At first, I was just curious. I’d seen these tiny pixel-like sculptures online and thought, how hard could it be? Spoiler: it’s a learning curve, but also seriously addictive.
My first project was a pair of pink cow earrings (which is funny, because I don’t even like pink that much, but they turned out adorable). Then I made a few mini display figures, only a few inches tall, super fragile, and not at all kid-proof, but they looked amazing on my craft shelf.
Of course, I couldn’t stop there. Soon, I was trading crafts with fellow makers, snail earrings for cross-stitch, and MLP-themed crochet for embroidered tote bags. If you’ve ever fallen into the craft trade rabbit hole, you know how fun it is. I even got a request to make Twilight Sparkle, and as a fellow fan… how could I say no?
But the biggest question I kept getting (and asked myself, honestly) was: How do you actually make 3D Perler Bead patterns? I had to do some digging. I discovered VoxelShop, a free 3D voxel art program, and it changed everything.
It lets you design each layer digitally, which you then iron individually and glue together, no full-melt, just enough to hold the shape and stack neatly.
There’s also a “jigsaw” method that uses interlocking beads (highly recommend checking out Kandiperlerfairy on Instagram for inspiration). Between YouTube tutorials and generous creators sharing free patterns, I finally started making my own designs, and now I’ve got a whole box full of ready-to-glue layers and color-coordinated beads.
If you’re new to 3D Perler Bead art, just know: it looks tricky, but once you get the hang of it, it’s like pixel LEGO magic. Grab your tweezers, fire up your iron, and start stacking. There’s a whole tiny world to build.
14. 3D Perler Bead Cube Box – Functional Storage Design
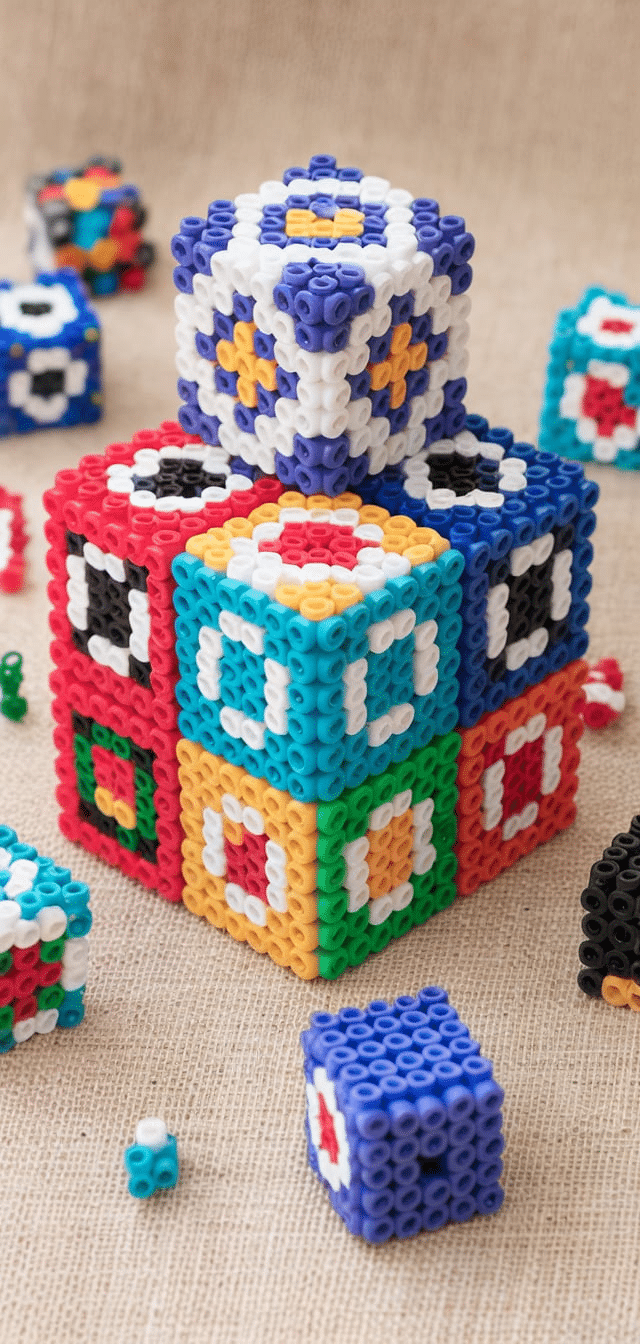
Create a customizable cube to store mini items or serve as a dice box. Use six identical square panels, each crafted on a 29×29 pegboard.
Tips:
- Use clear fishing line for invisible seams.
- Reinforce corners by double-fusing edges.
- Add internal supports using smaller bead rods for structural stability.
13. 3D Mario Mushroom – Iconic Gaming Model
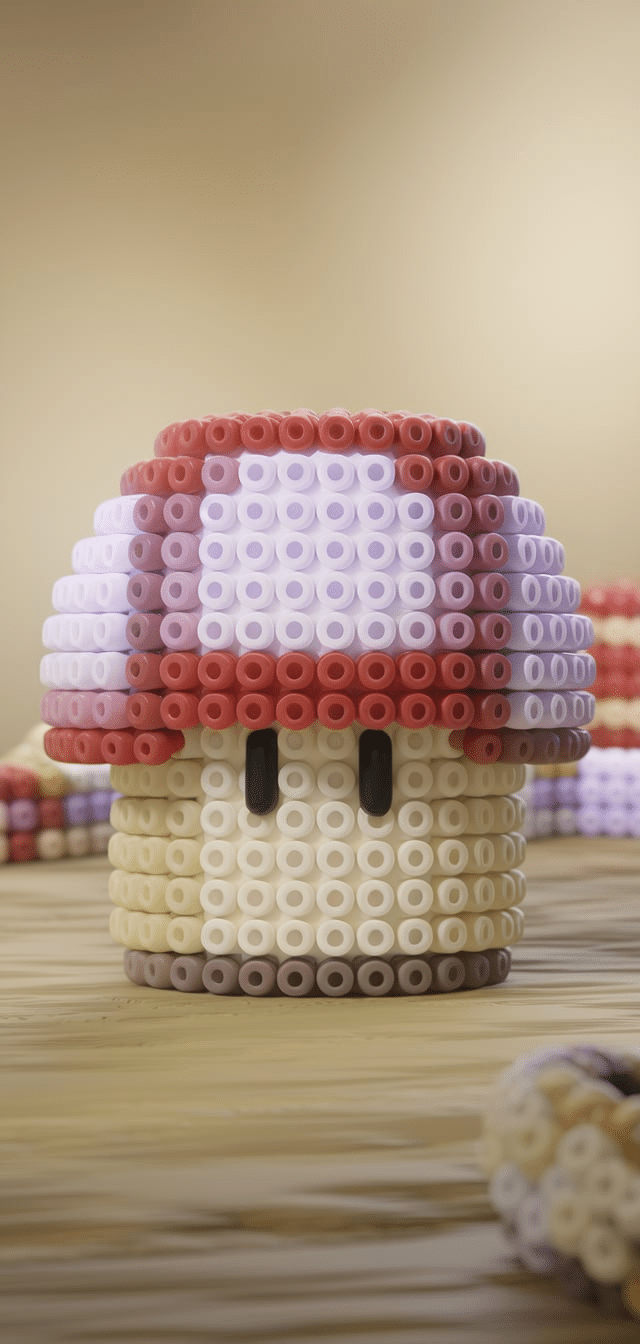
Design each layer separately and stack them using melted bead connectors or glue. Base diameter: 20 pegs.
Tips:
- Use stiff cardboard templates to align the layers.
- Add felt or foam to the bottom to prevent sliding.
12. 3D Perler Bead Poké Ball – Hollow Hinged Design
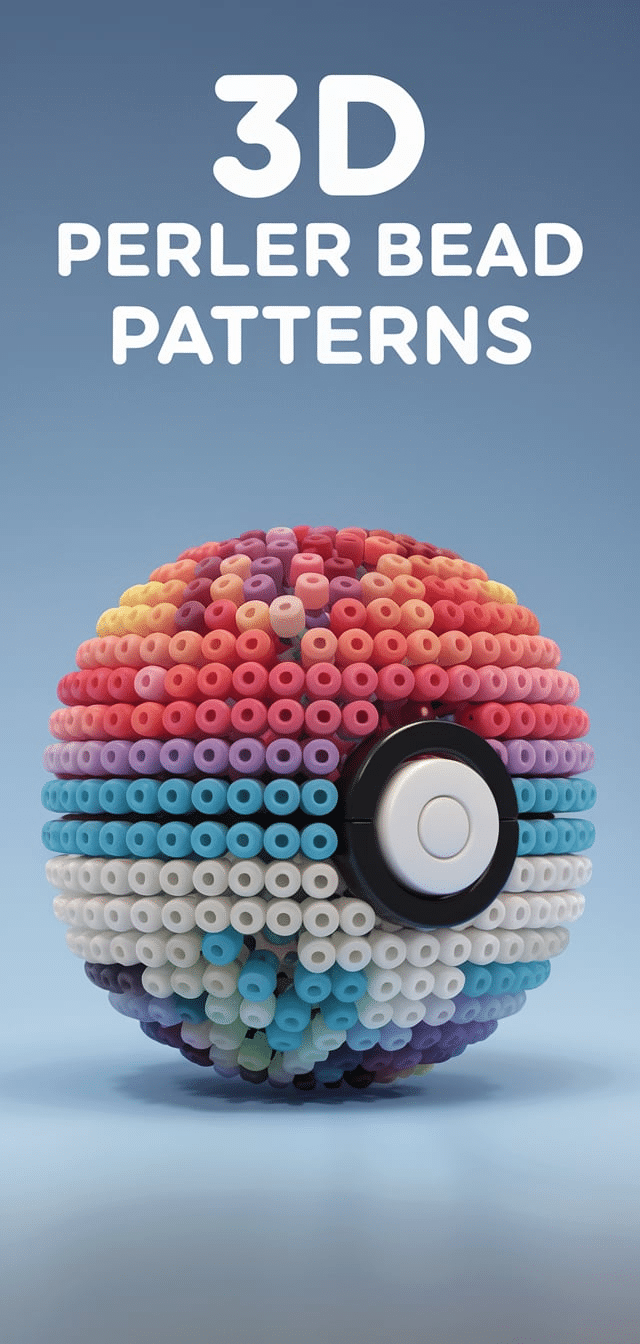
Split the pattern into two hemispheres and add a hinge system with un-fused bead loops.
Tips:
- Use contrasting colors (red/white/black) for visual impact.
- Attach a small magnet at the clasp for a satisfying click.
11. 3D Animal Figurines – Kawaii Style Pets
From cats to pandas, create animal bodies with separate pieces for limbs, tails, and ears.
Tips:
- Sketch your own templates or use isometric references.
- Iron on medium heat to preserve peg shapes.
10. 3D Christmas Ornament Spheres – Festive Hanging Décor

Make four curved panels and interlock them to form a spherical design. Add a loop on top for hanging.
Tips:
- Use glitter or metallic beads for festive shine.
- Insert mini LED lights for a glowing ornament.
9. 3D Miniature Furniture – Dollhouse Ready
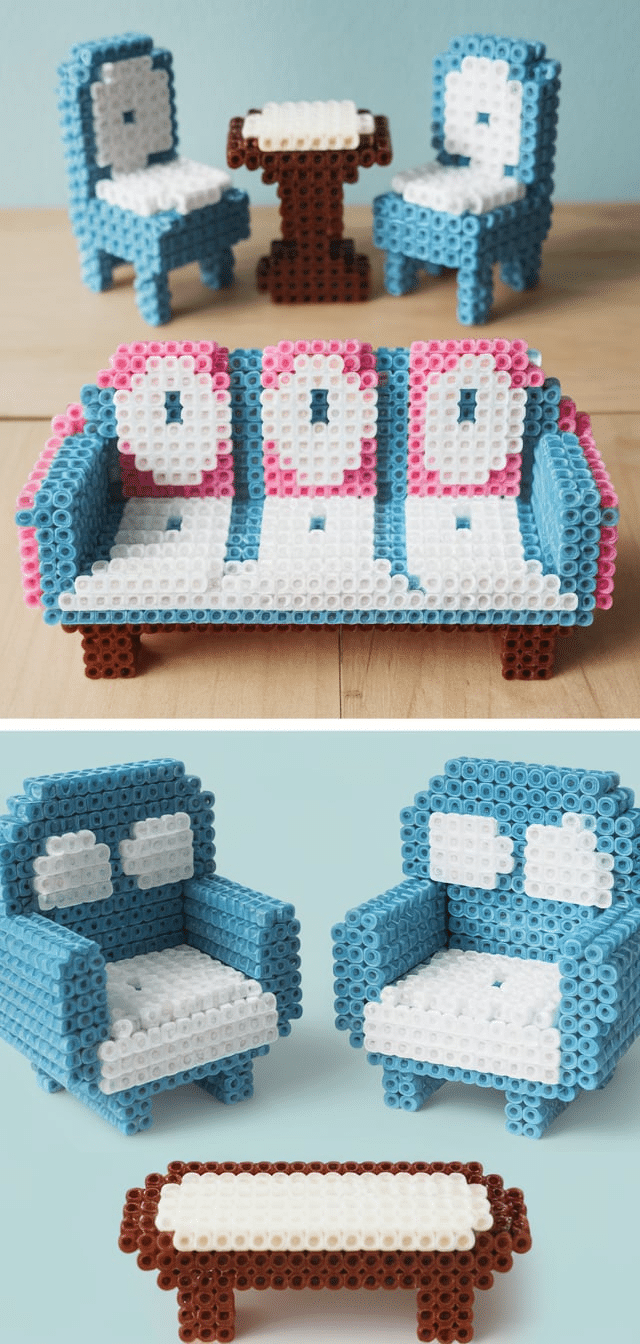
Tables, chairs, and shelves can all be made using rectangular panels and support pieces.
Tips:
- Glue joints with a hot glue gun for sturdiness.
- Use wood-tone Perler bead colors for realism.
8. 3D Ice Cream Cone – Multi-Layer Sculpture
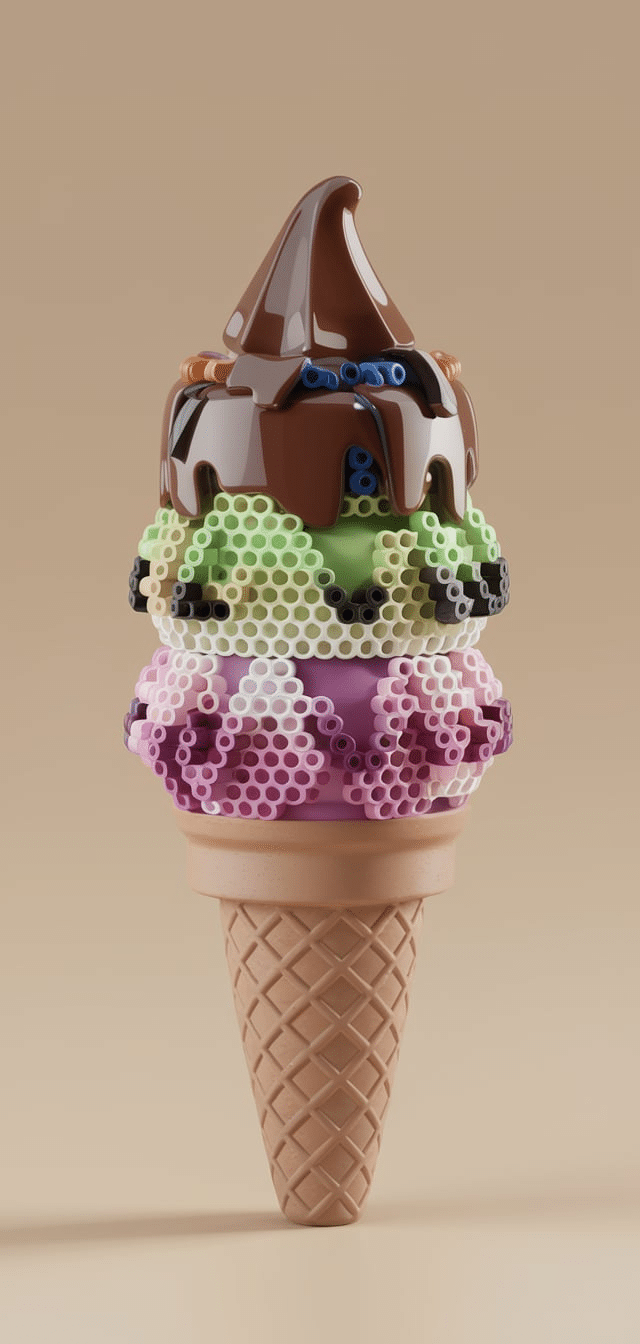
Craft a base cone and stack multiple scoops in pastel tones.
Tips:
- Use ombré color transitions for scoops.
- Lightly iron scoops so they curve inward, creating a rounded effect.
7. 3D Treasure Chest – Hinged Lid Model
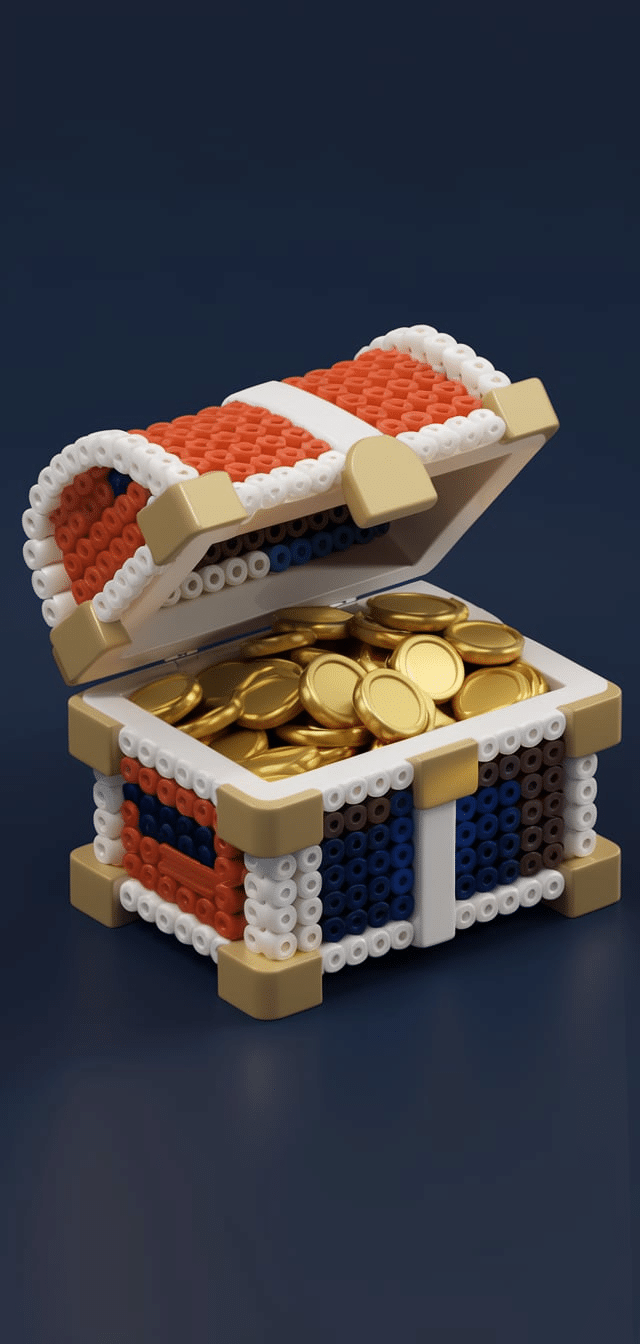
Create a pirate-style chest with golden bead accents and a working lid.
Tips:
- Use brown, black, and gold beads for authentic look.
- Insert a toothpick as a hinge axis for function.
6. 3D Flower Pot with Blossoms – Desk Decoration
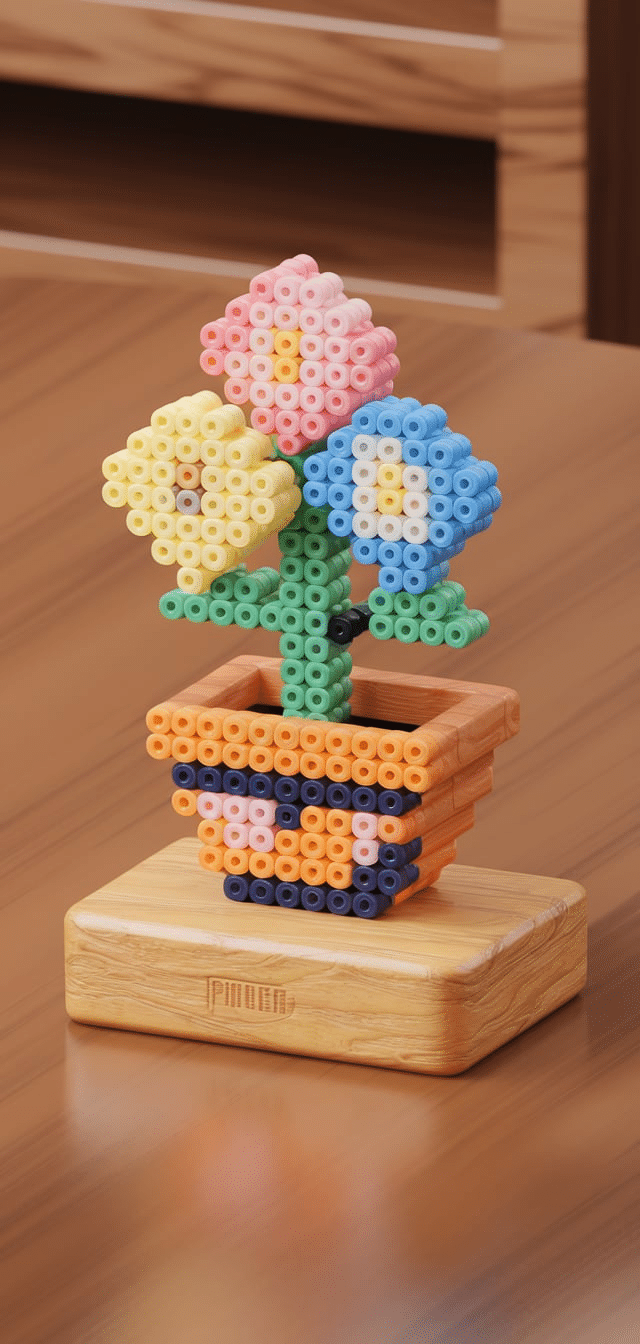
A hexagonal base with upright petals fused onto wire stems inserted into bead soil.
Tips:
- Use soft floral wire to make repositionable stems.
- Spray with a sealant to maintain color vibrancy.
5. 3D Spaceship or UFO Model – Sci-Fi Design

Base the build on concentric layers from bottom to top, adding clear bead domes.
Tips:
- Use glow-in-the-dark beads for windows.
- Iron panels gently to preserve a smooth finish.
4. 3D Castle Tower – Fantasy Architecture

Stack round bases with crenellated tops and bridge elements.
Tips:
- Make small flags with mini beads on toothpicks.
- Include small holes in base to insert LED tea lights.
3. 3D Sushi Roll Set – Realistic Food Replicas
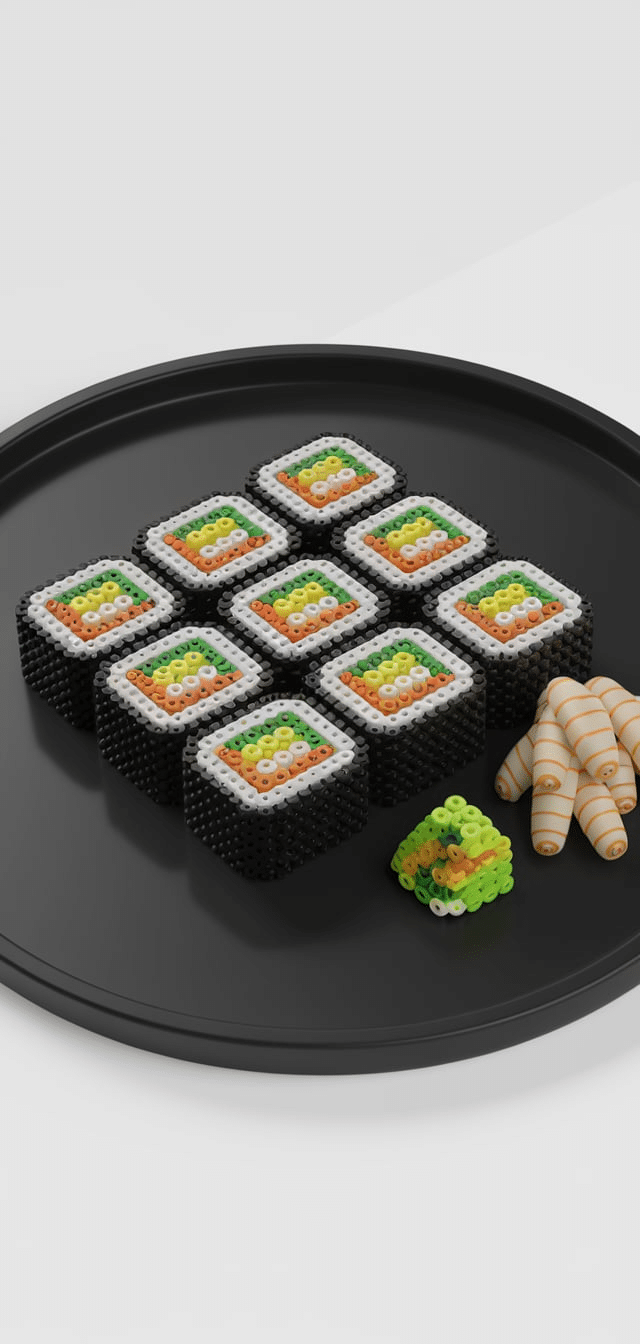
Each roll is a cylindrical base with topping designs on top and textured sidewalls.
Tips:
- Use black beads for seaweed wrap and varied tones for fillings.
- Pair with wasabi and soy sauce dishes for realism.
2. 3D Perler bead Robot Character
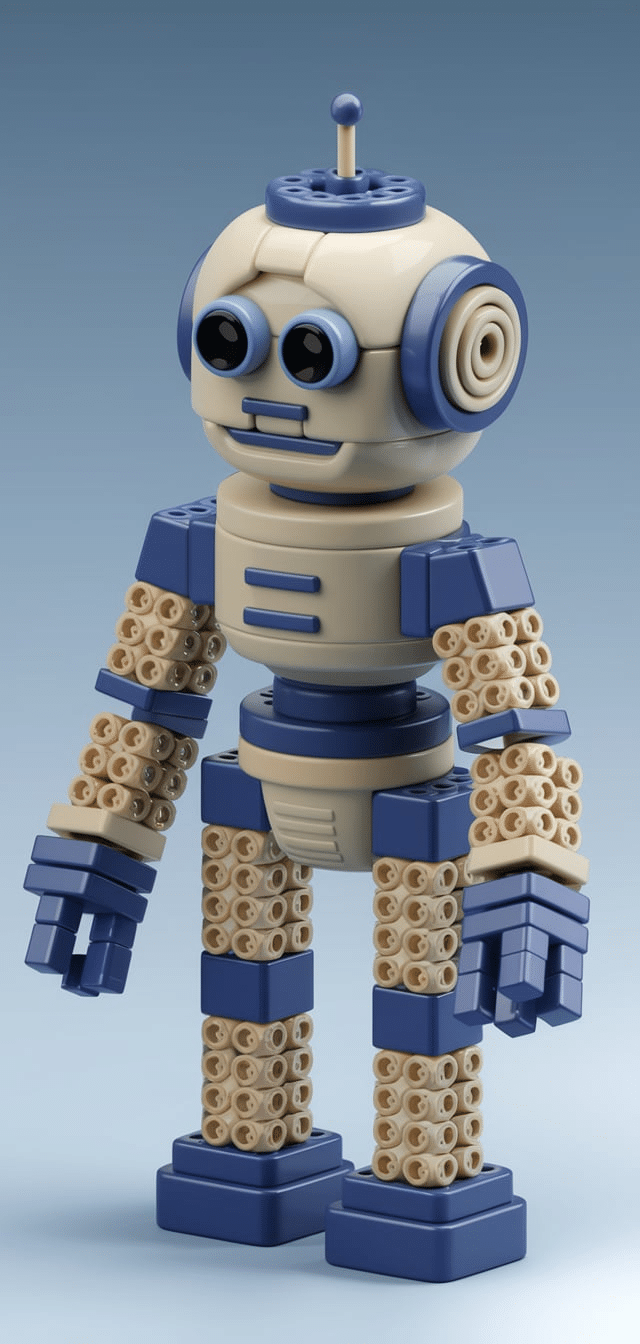
Craft arms, legs, and head as separate articulated units. Use a square base for the torso.
Tips:
- Use transparent beads for sci-fi effects.
- Iron joints lightly to keep them movable.
1. 3D Perler Bead Lantern – Light-Up Home Accent
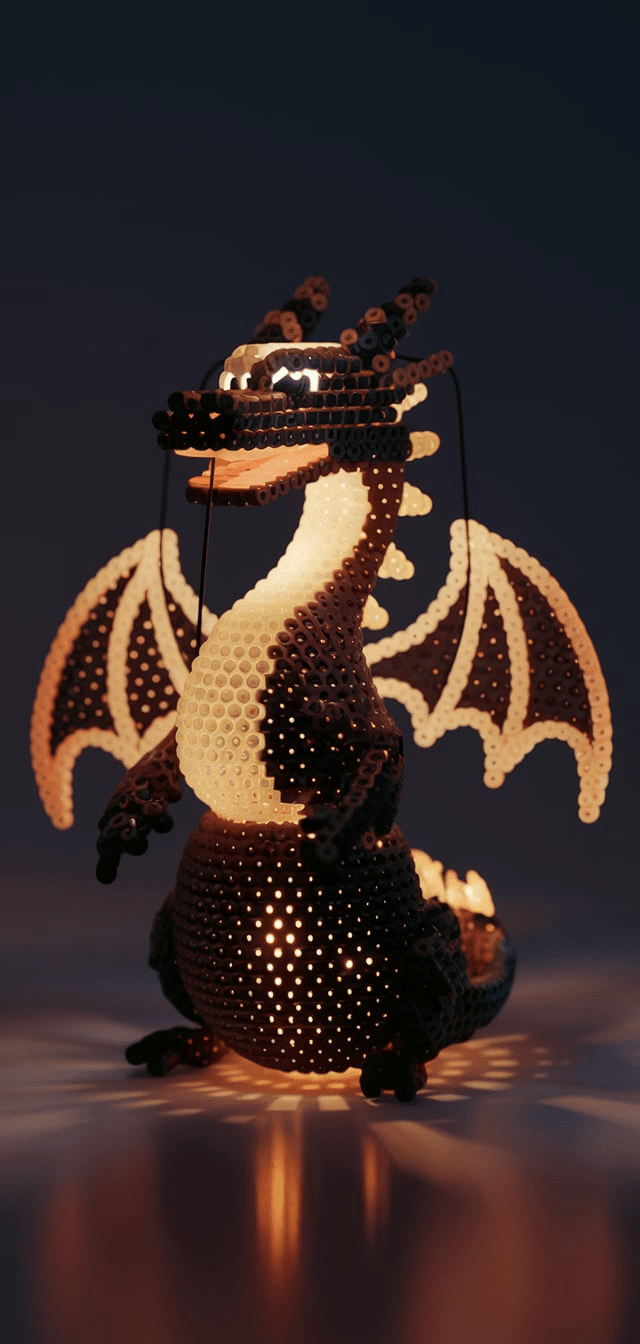
Construct four wall panels with cutouts for design, attach them to a square base, and top them with a pyramid roof for a nice 3D Perler bead.
Tips:
- Use translucent beads and place a battery-operated tealight inside.
- Reinforce the top with cardboard for better structure.
Conclusion
The world of 3D Perler bead designs offers immense creative potential, merging structure with pixel-like art. By following these detailed tips and ideas, anyone from a hobbyist to a professional can produce durable, eye-catching bead sculptures that stand out on shelves, desks, or gift boxes. From practical uses to pure display pieces, 3D Perler bead patterns elevate the medium beyond traditional flat crafts.