Make sure to join my list for Weekly Tips and Recipes to Your Inbox
16 Ingenious DIY Wooden Pallet Projects
When I started building my wood table, I had no plans for pallet projects, just a pile of free pallet wood and an idea. I wanted to create a sturdy table for my Chaeto algae tank in my 2 car garage, so I dove straight into the project.
The most time-consuming part was breaking down 27 pallets and removing all the nails, which took over nine hours. After that, I ran each board through the planer on all sides, a process that lasted three days. By the end, I had created a big pile of sawdust enough to fill a trash can.
The tabletop was my first focus, and I glued it up into five sections, each with ten boards. For the legs, I originally considered a simple attachment to the sides, but I opted for finger joints to add a more handcrafted, standout look.
To elevate the design even further, I repurposed five cut-offs from the tabletop to create feet for the legs. I wanted to avoid using any metal in this build, so instead of screws or nails, I secured shelf braces with dowels that were only 5 to 7 inches deep. This kept everything strong while maintaining an all-wood aesthetic.
Wooden pallets offer a versatile and low-budget resource for crafting pallet projects. Below, I present my 16 detailed DIY wooden pallet projects that I make, each accompanied by comprehensive instructions to guide you.
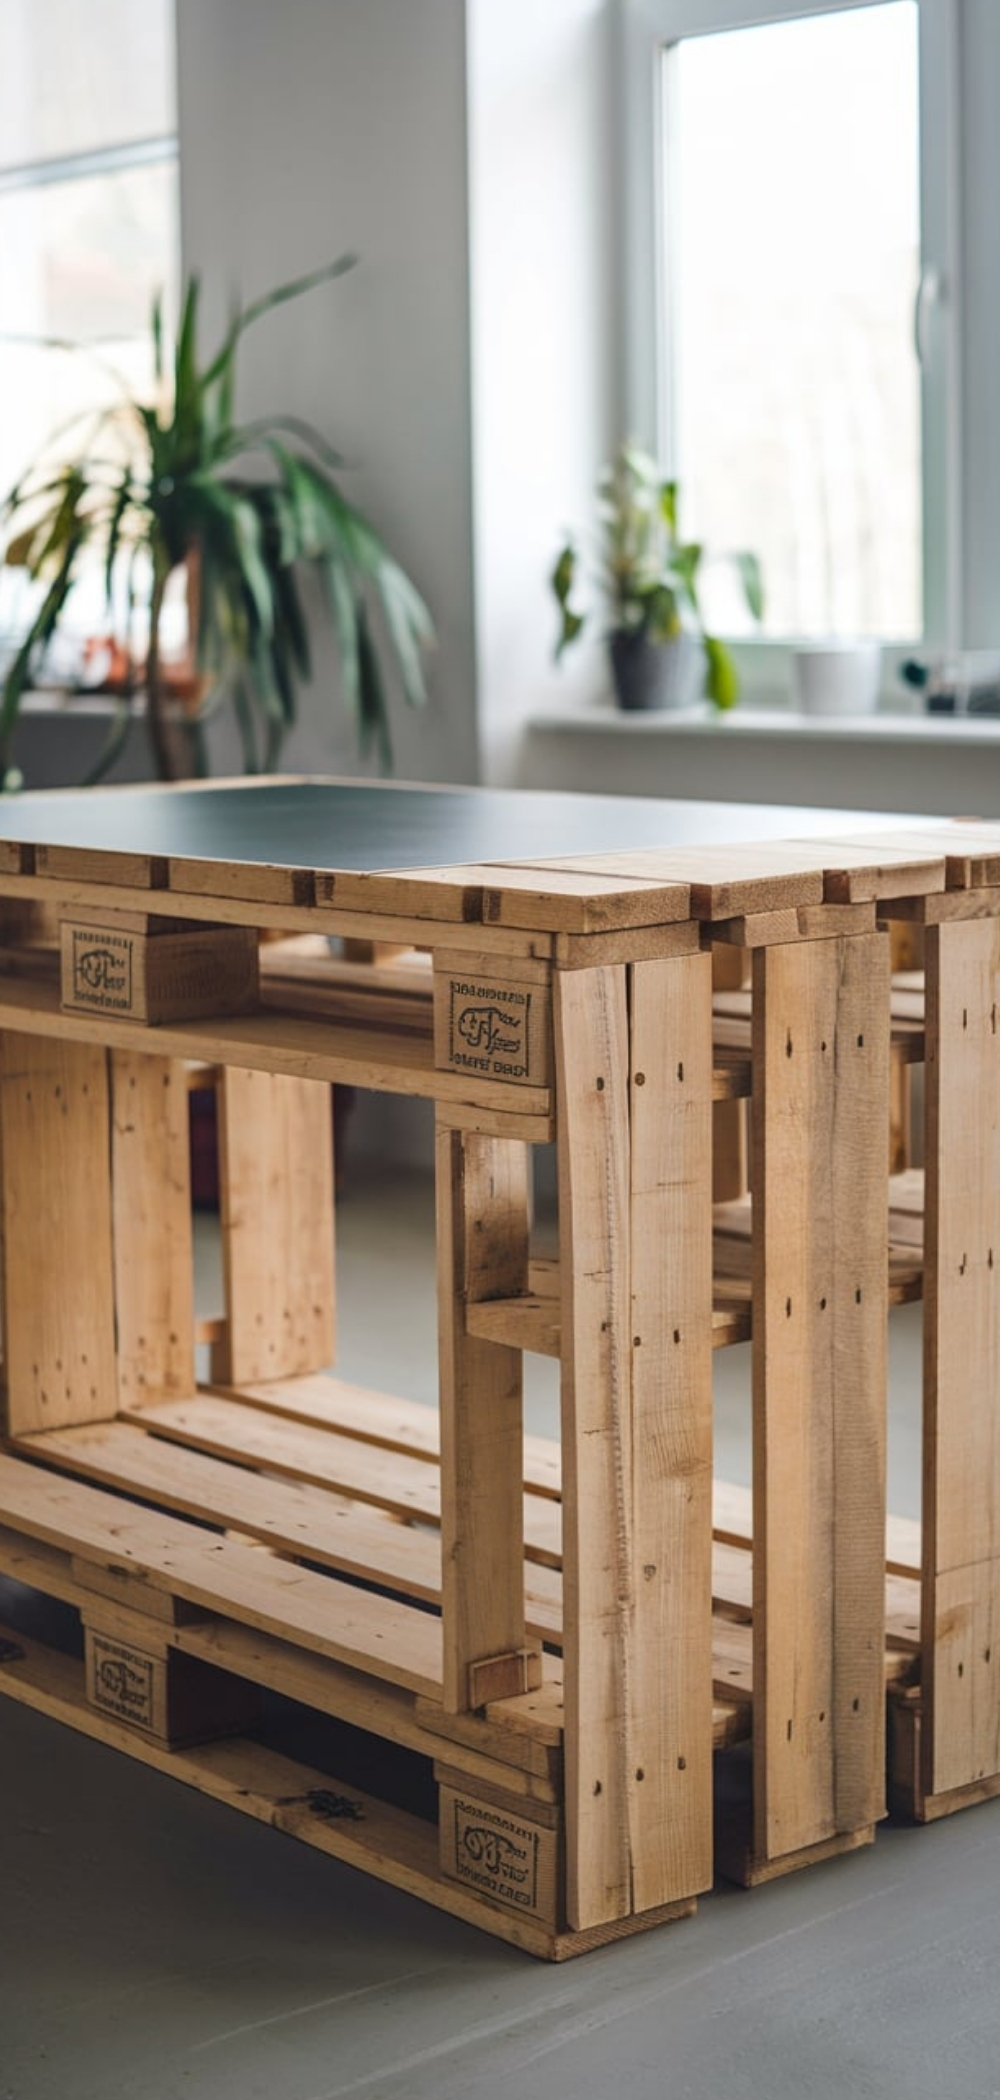
16. Pallet Coffee Table with Storage
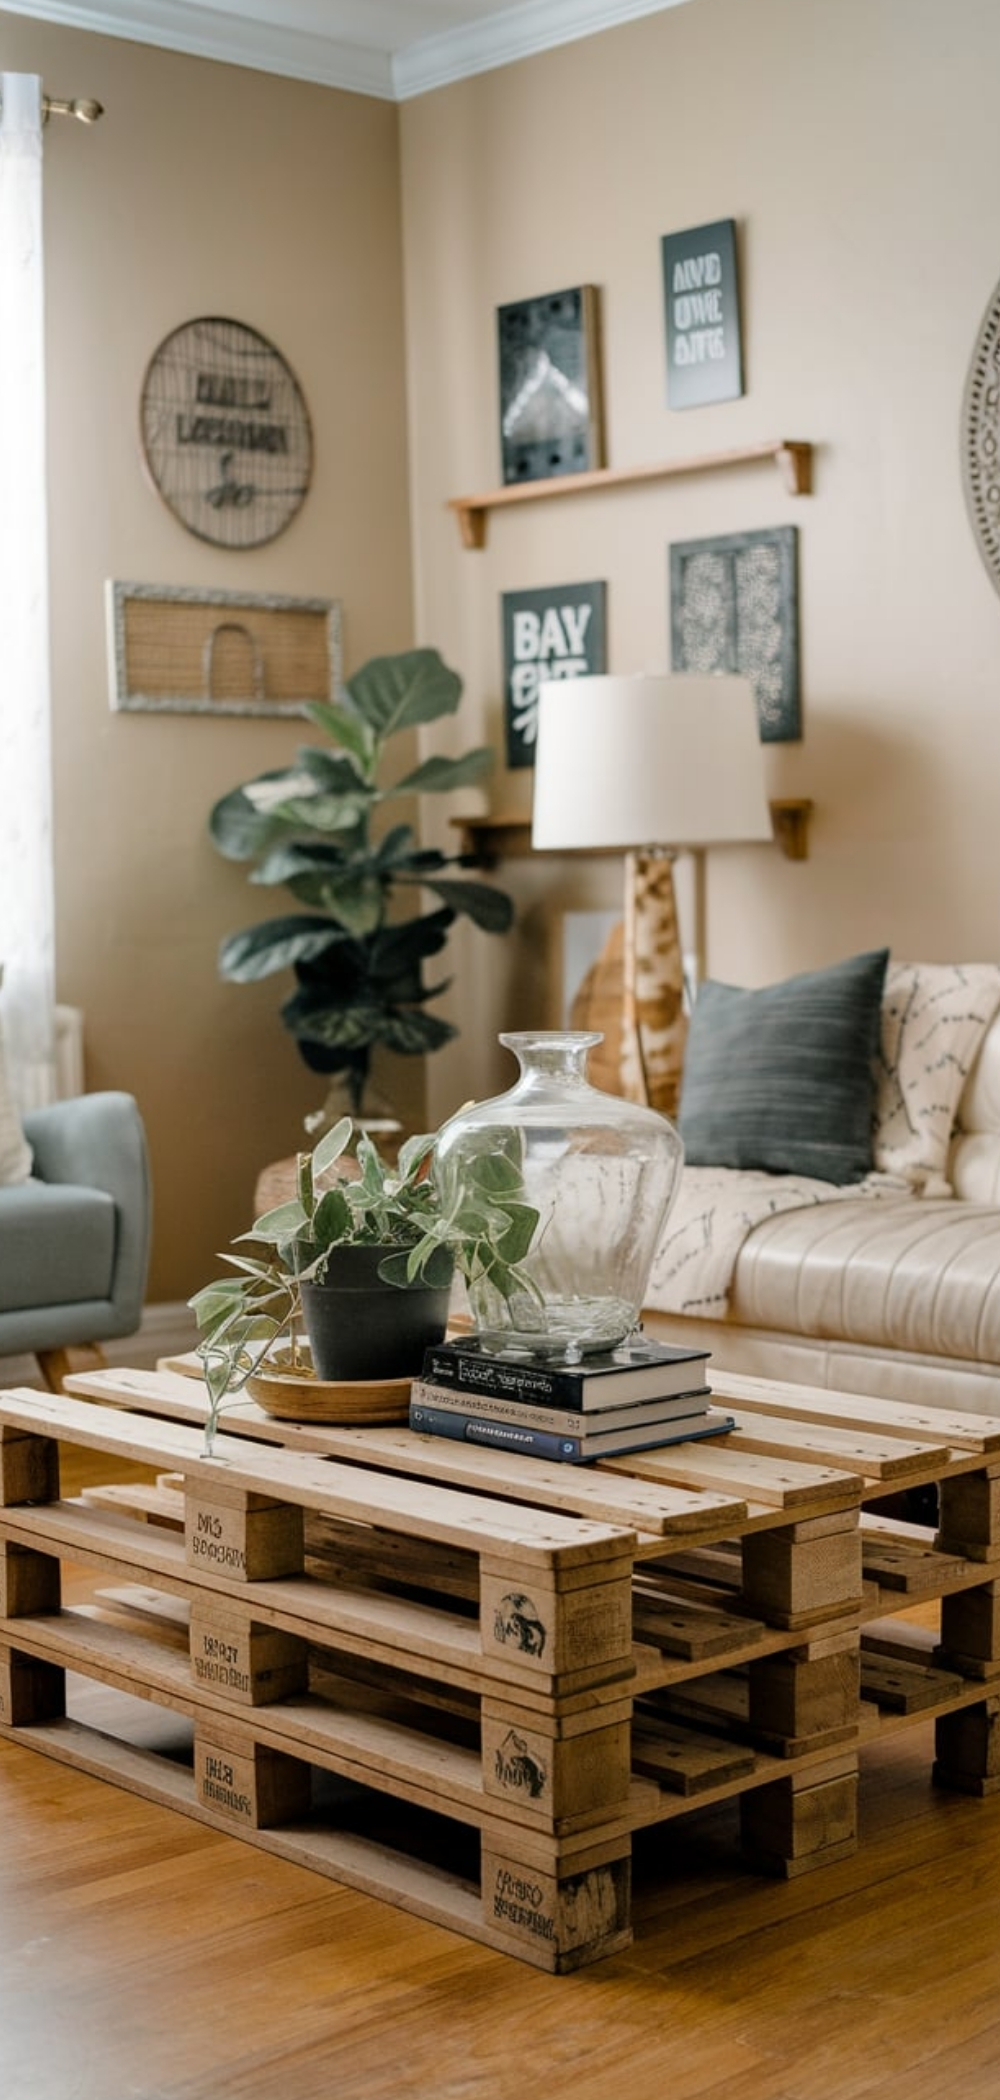
A pallet coffee table serves as a centerpiece in your living room, providing both aesthetic appeal and practical storage solutions.
Materials Needed:
- Two wooden pallets
- Sandpaper (medium and fine grit)
- Wood screws
- Four caster wheels
- Wood stain or paint (optional)
- Clear sealant
Instructions:
- Preparation: Select two pallets of similar size. Sand all surfaces thoroughly to remove splinters and rough edges.
- Assembly: Stack the pallets atop each other, aligning them evenly. Secure them together using wood screws at the corners and along the sides.
- Mobility: Attach a caster wheel to each corner of the bottom pallet for easy movement.
- Finishing Touches: Apply a wood stain or paint to match your decor, followed by a clear sealant to protect the wood.
Tip: Utilize the space between the pallets for storing magazines, remote controls, or decorative items.
15. Vertical Pallet Garden
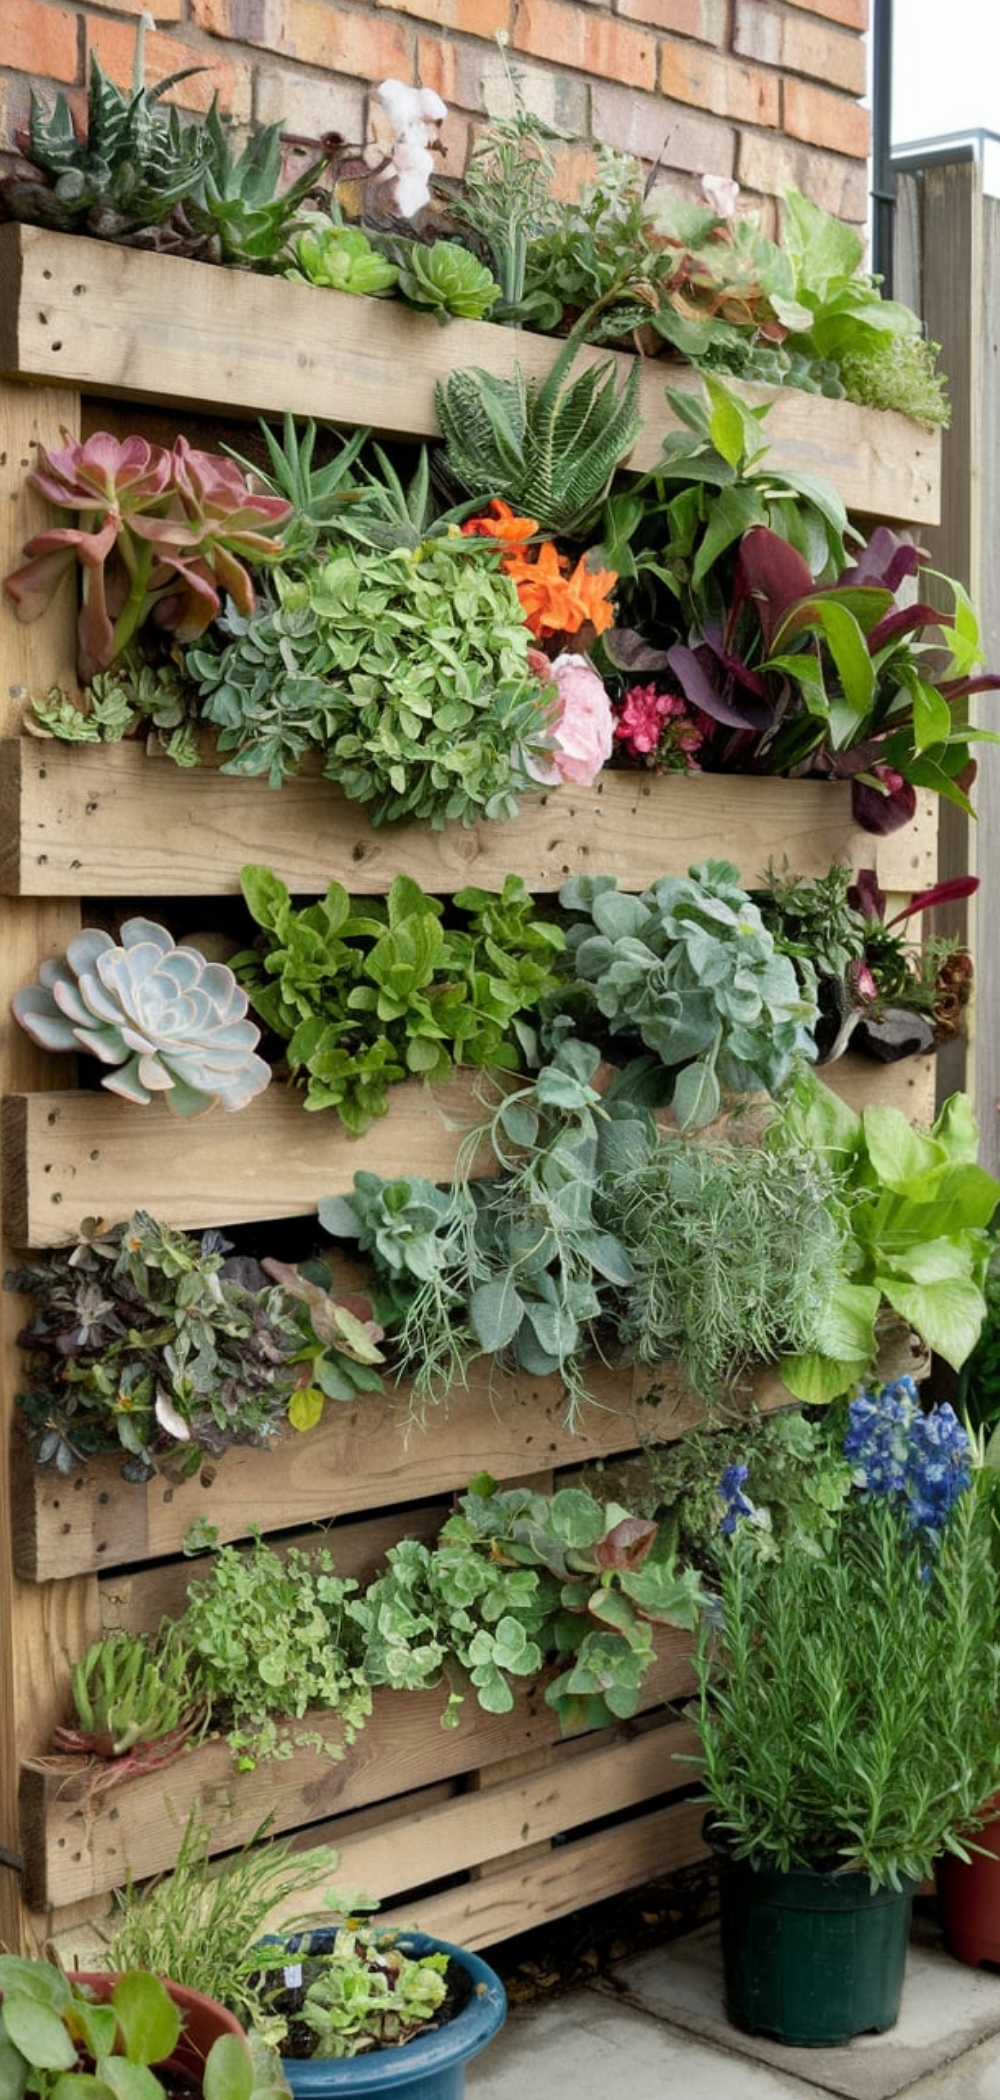
Transform a wooden pallet into a vertical garden, perfect for small spaces or as a decorative outdoor feature.
Materials Needed:
- One wooden pallet
- Landscape fabric
- Staple gun
- Potting soil
- Selection of plants (herbs, succulents, or flowers)
Instructions:
- Preparation: Sand the pallet to remove any rough areas.
- Lining: Attach landscape fabric to the back, bottom, and sides of the pallet using a staple gun, creating a secure pocket for soil.
- Planting: Place the pallet flat on the ground. Fill it with potting soil, ensuring it’s well-packed. Plant your chosen greenery between the slats.
- Positioning: Allow the plants to establish roots over a couple of weeks before positioning the pallet upright.
Tip: Choose plants suitable for vertical growth and consider the sunlight exposure of the intended location.
14. Pallet Headboard
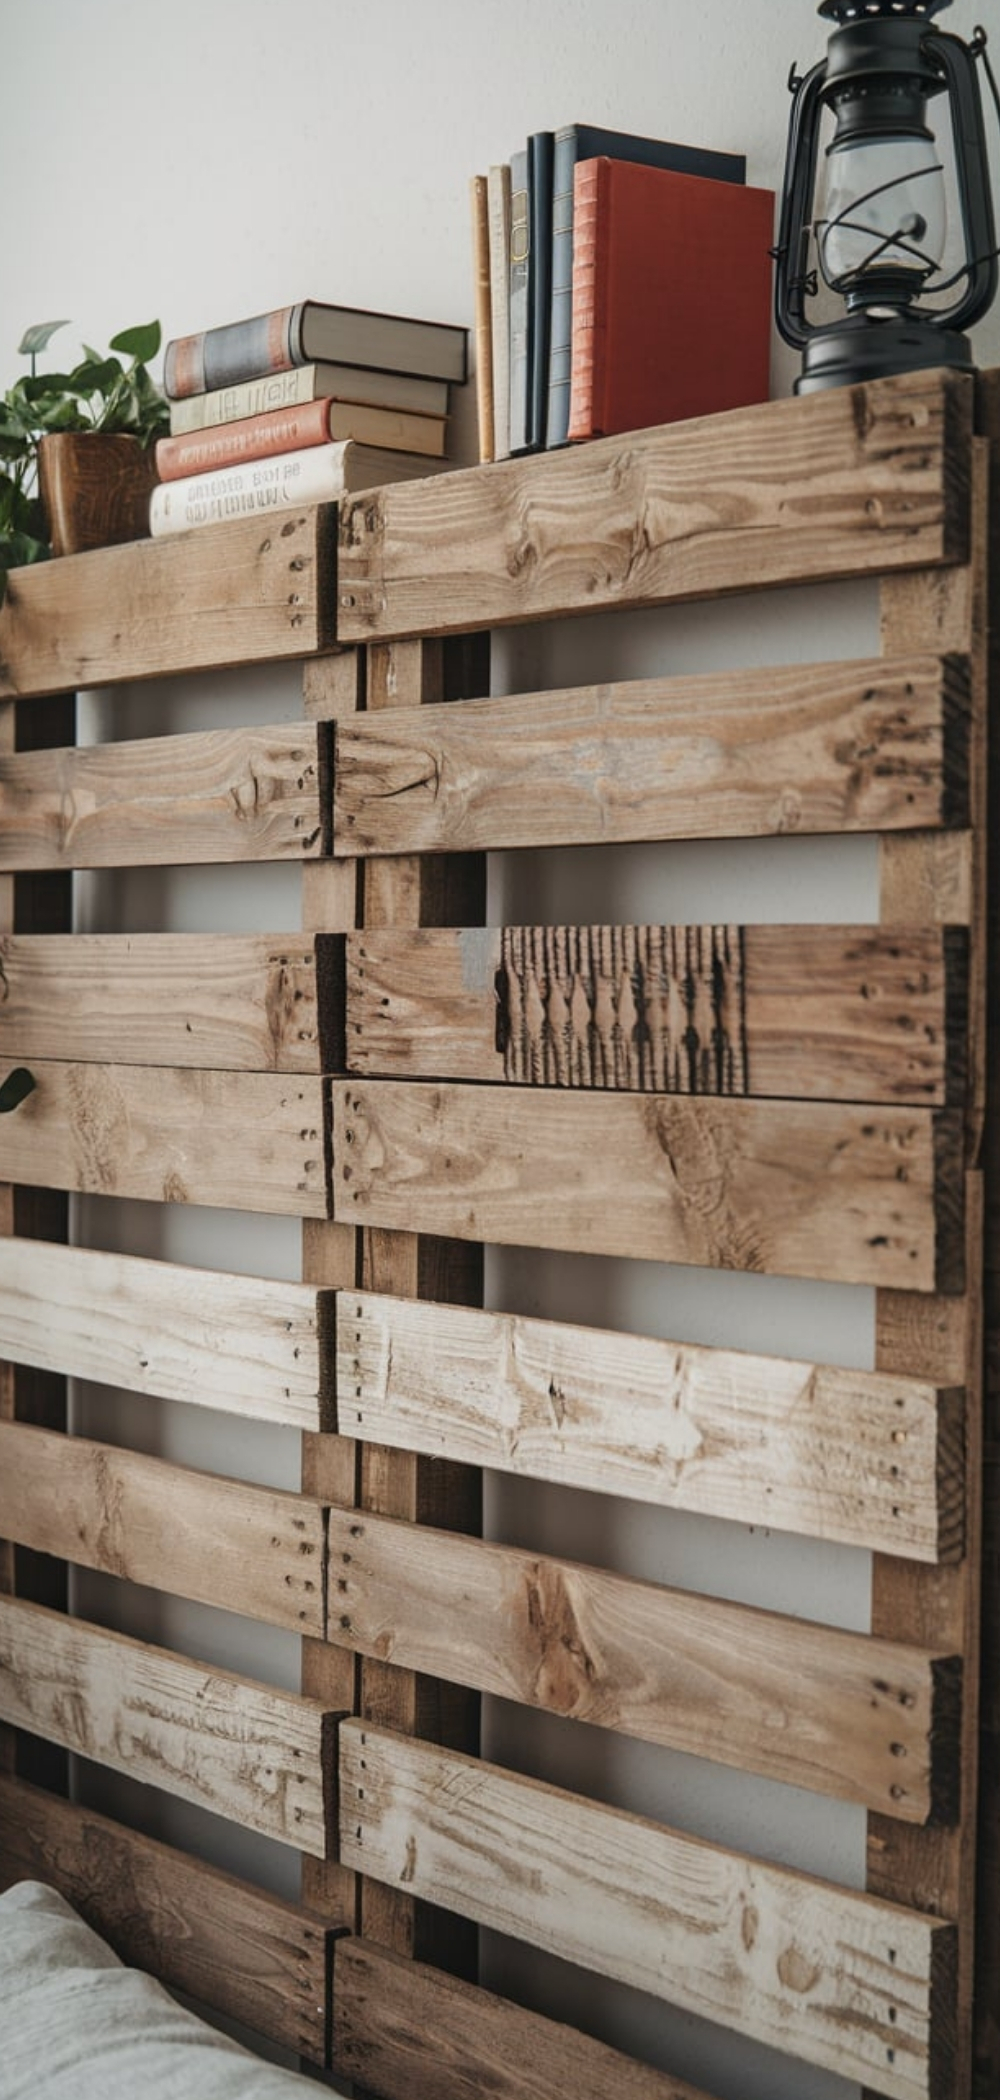
Create a rustic headboard to add character to your bedroom.
Materials Needed:
- Two to three wooden pallets (depending on bed size)
- Sandpaper
- Wood screws
- Wall mounts or brackets
- Wood stain or paint (optional)
Instructions:
- Disassembly: Carefully dismantle the pallets to obtain individual planks.
- Design Layout: Arrange the planks on the floor in your desired pattern, considering varying lengths and widths for a rustic look.
- Assembly: Attach horizontal support planks across the arranged vertical planks using wood screws.
- Finishing: Sand the assembled headboard to a smooth finish. Apply stain or paint if desired.
- Installation: Mount the headboard to the wall behind your bed using appropriate brackets or wall mounts.
Tip: Incorporate a shelf or built-in lighting for added functionality.
13. Pallet Bookshelf
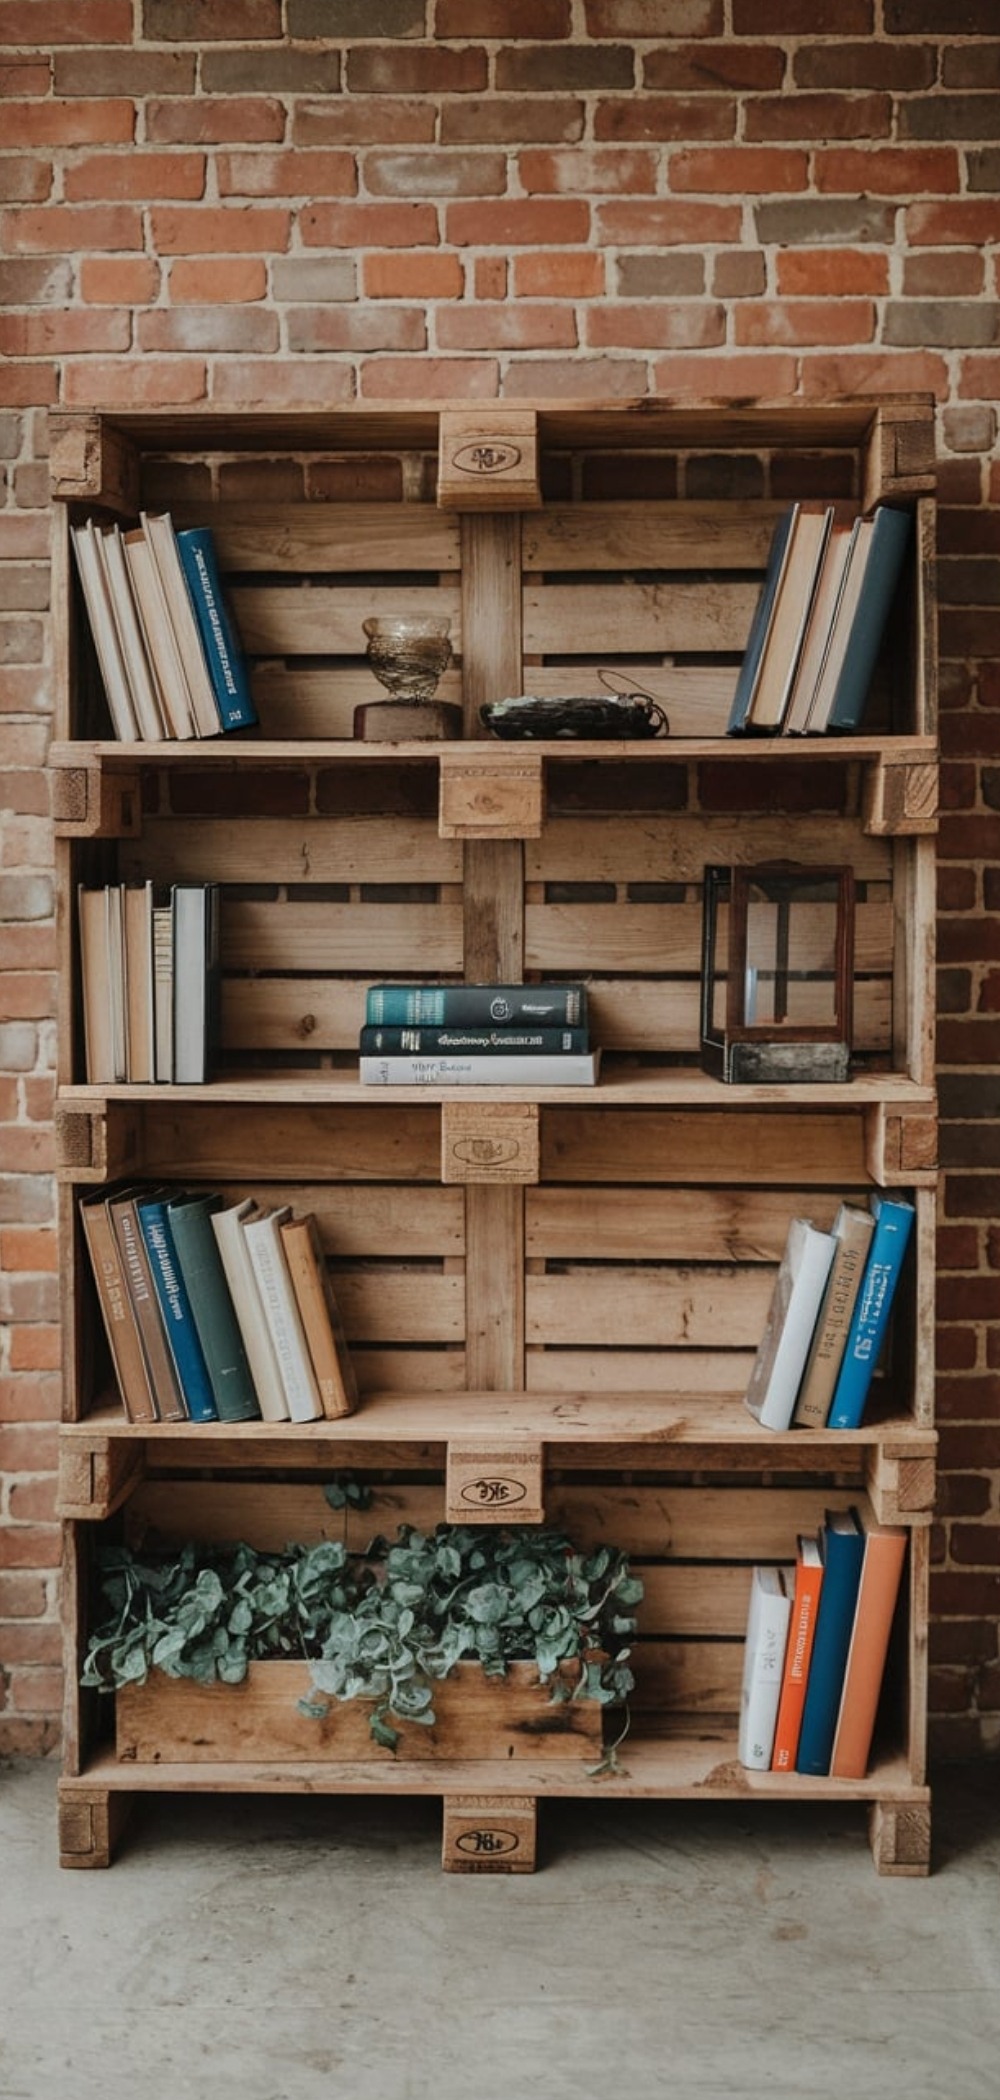
A pallet bookshelf offers a rustic storage solution for books and decorative items.
Materials Needed:
- One to two wooden pallets
- Sandpaper
- Wood screws
- Brackets for wall mounting
- Wood stain or paint (optional)
Instructions:
- Preparation: Sand the pallet to remove rough edges.
- Customization: If desired, cut the pallet to your preferred size or shape.
- Finishing: Apply stain or paint to match your decor.
- Mounting: Secure the pallet to the wall using sturdy brackets, ensuring it is level.
Tip: Use multiple pallets to create a larger shelving unit or a unique wall display.
11. Pallet Projects: Swing Bed
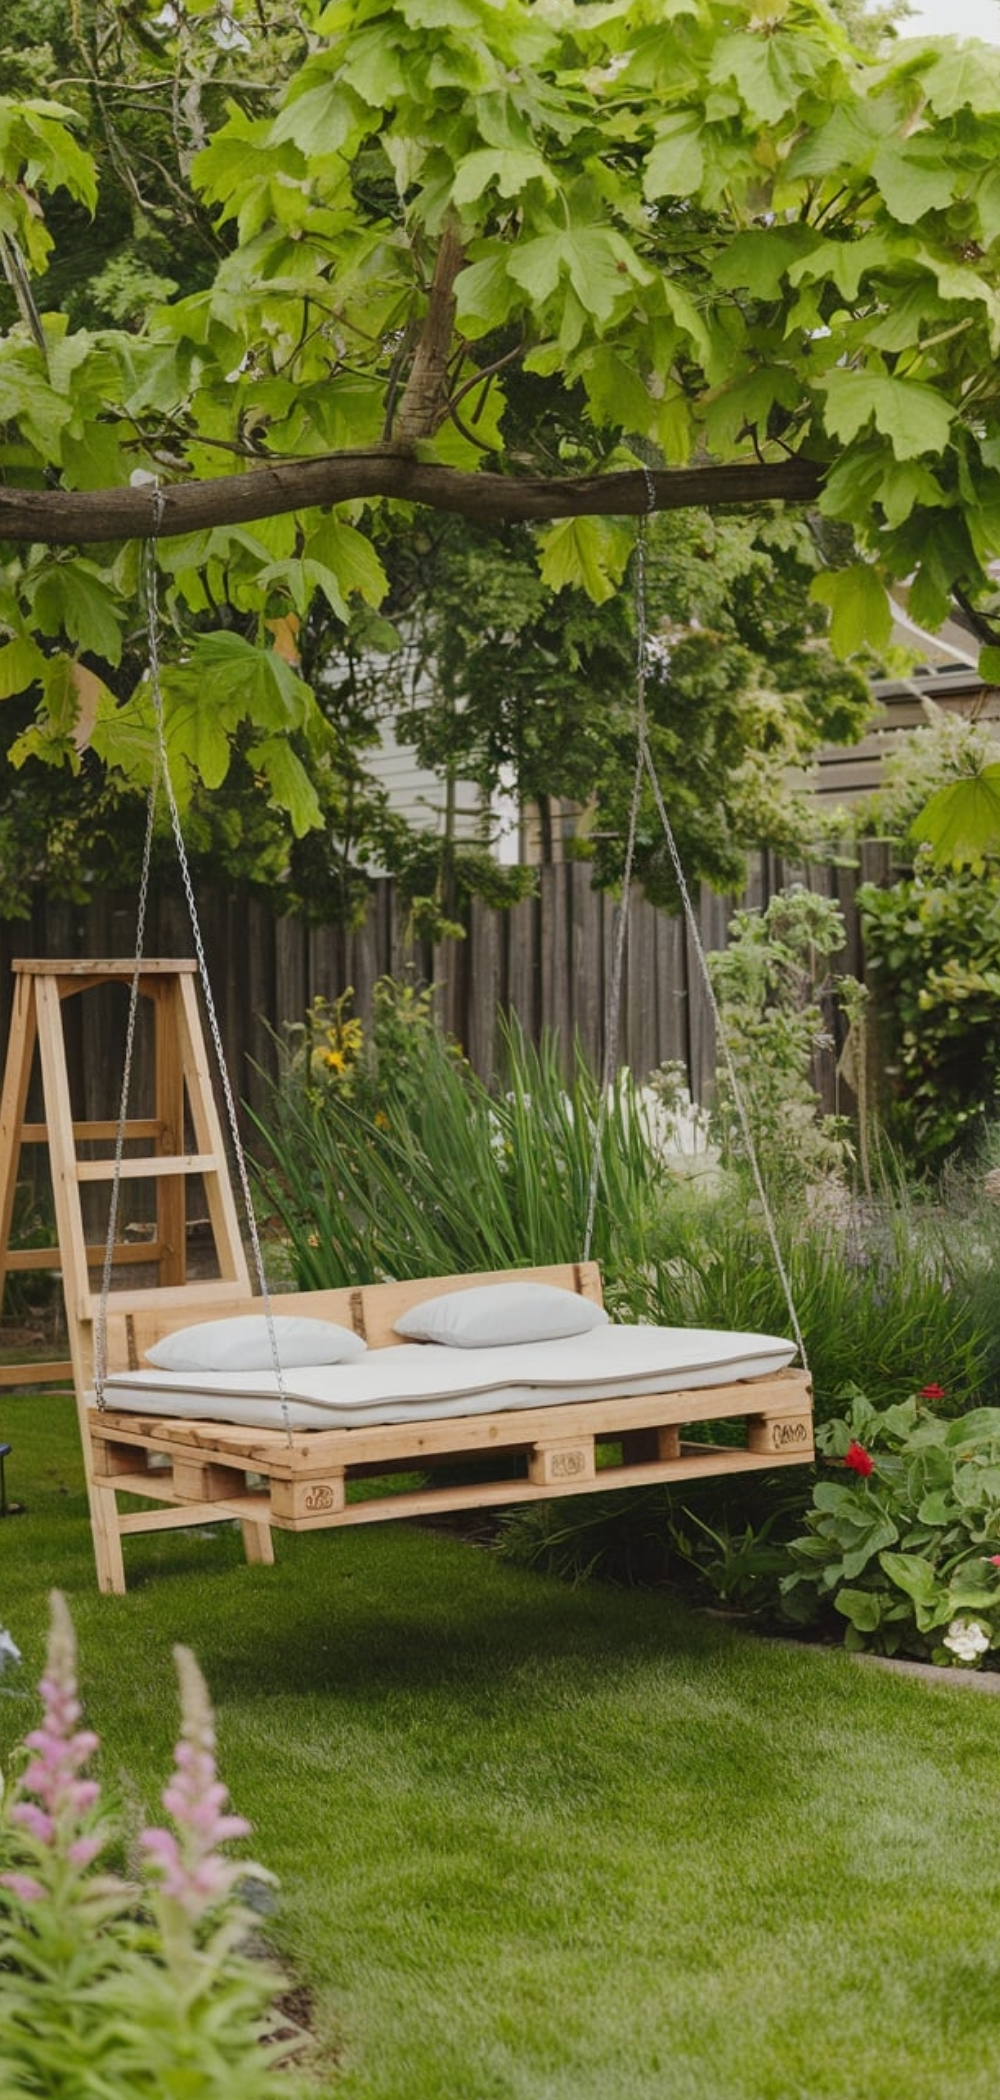
Create a relaxing outdoor retreat with a pallet swing bed.
Materials Needed:
- Two to three wooden pallets
- Sandpaper
- Heavy-duty rope or chain
- Eye bolts
- Outdoor mattress or cushions
- Wood stain or paint (optional)
Instructions:
- Assembly: Align two pallets side by side and secure them together using wood screws to form the base of the swing bed.
- Reinforcement: Add additional planks across the bottom for extra support.
- Sanding: Thoroughly sand the entire structure to prevent splinters.
- Finishing: Apply a weather-resistant stain or paint to protect the wood.
- Drill Holes: Drill four evenly spaced holes in the corners of the pallet base for the rope or chain.
- Attach Suspension: Insert heavy-duty eye bolts into the drilled holes and secure them tightly. Thread the rope or chain through the eye bolts and tie secure knots or use carabiners.
- Hang the Swing: Find a sturdy tree branch, ceiling beam, or pergola to suspend the swing. Ensure the structure can support the weight before hanging.
- Add Comfort: Place an outdoor mattress or thick cushions on the pallet bed for a cozy lounging experience.
Tip: Use weather-resistant cushions and a waterproof stain to protect the swing from outdoor elements.
10. Pallet Projects: Outdoor Sofa
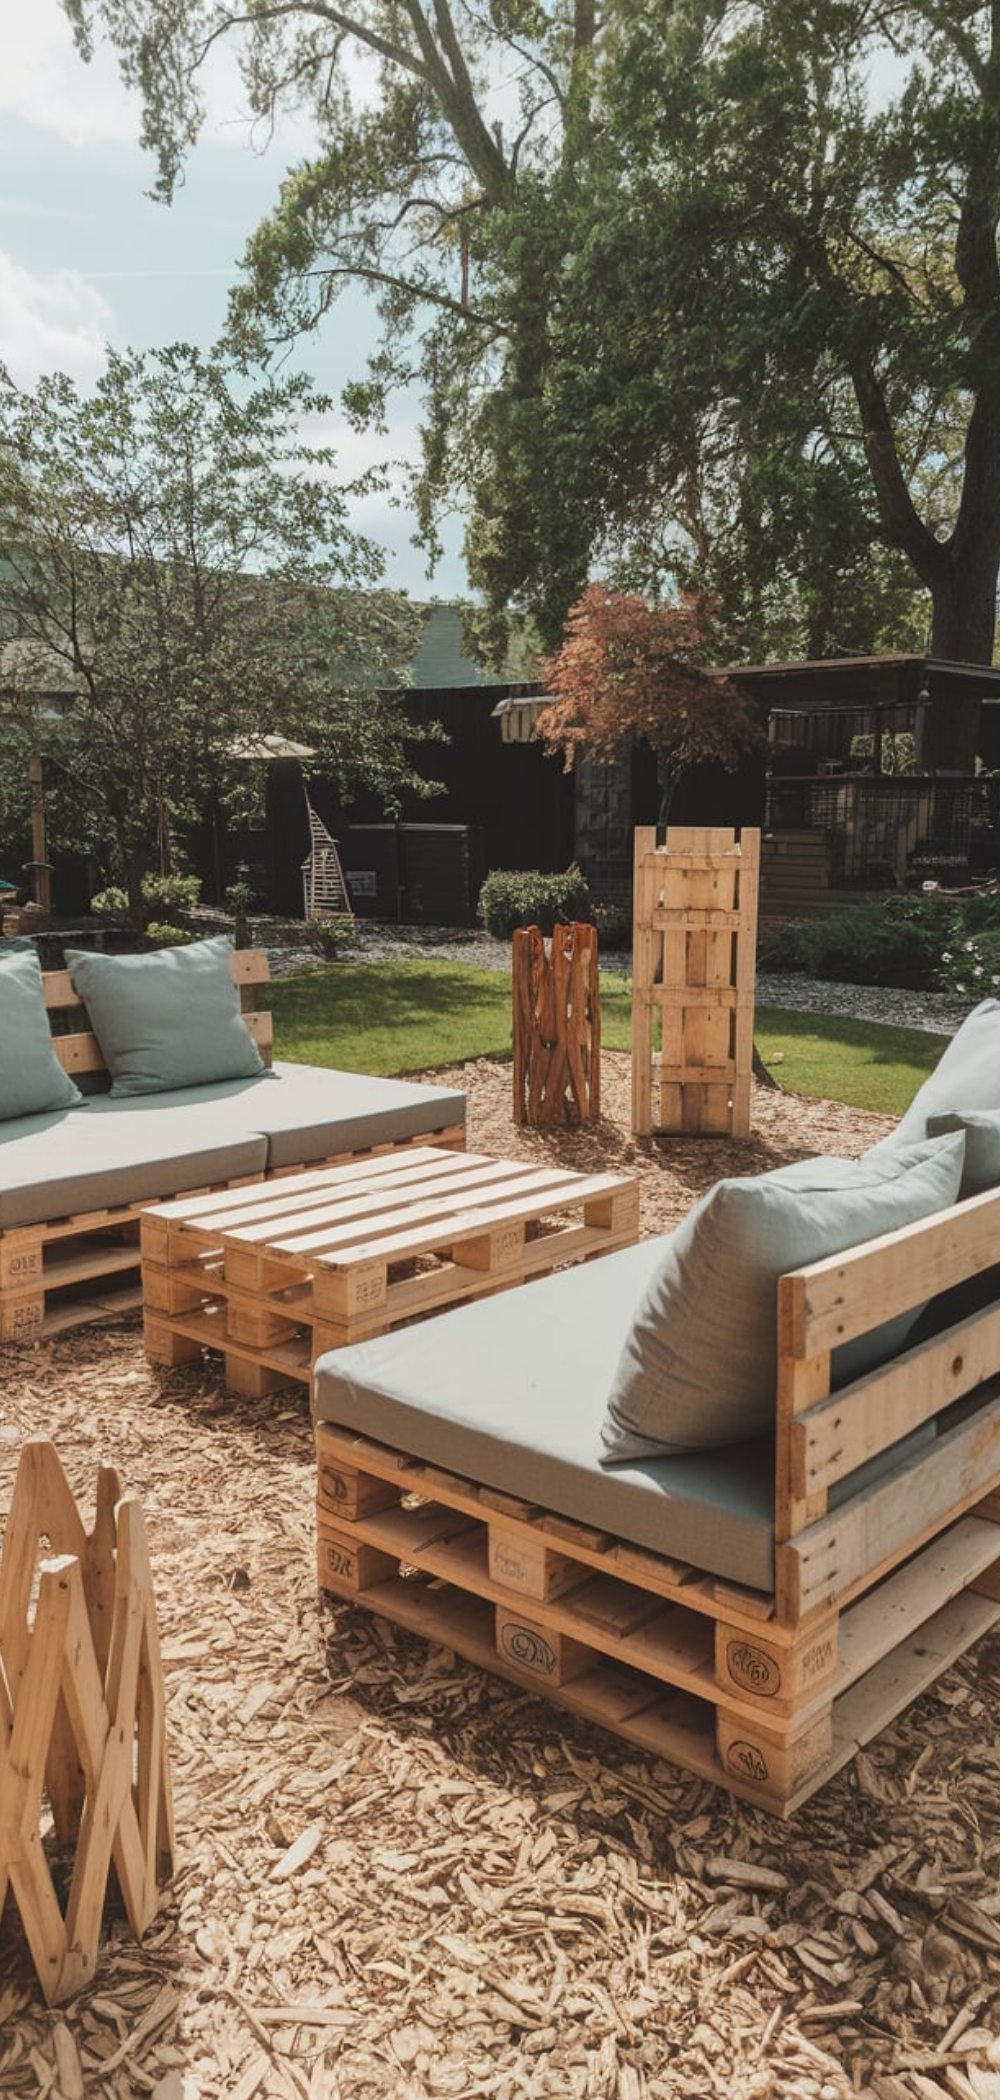
Build an outdoor seating area with pallets for a rustic yet stylish backyard lounge.
Materials Needed:
- Three to four wooden pallets
- Wood screws
- Sandpaper
- Outdoor cushions
- Wood stain or paint (optional)
Instructions:
- Prepare the Pallets: Sand all wooden surfaces to smooth out rough edges.
- Assemble the Base: Stack two pallets horizontally and secure them together using wood screws.
- Create the Backrest: Attach an upright pallet to one side of the base for back support, securing it with screws.
- Add Armrests (Optional): Cut additional pallet wood to create sturdy armrests on either side.
- Finishing Touches: Apply a stain or weatherproof sealant before adding outdoor cushions.
Tip: Use water-resistant fabric for the cushions to ensure longevity in outdoor conditions.
9. Pallet Projects: Herb Garden
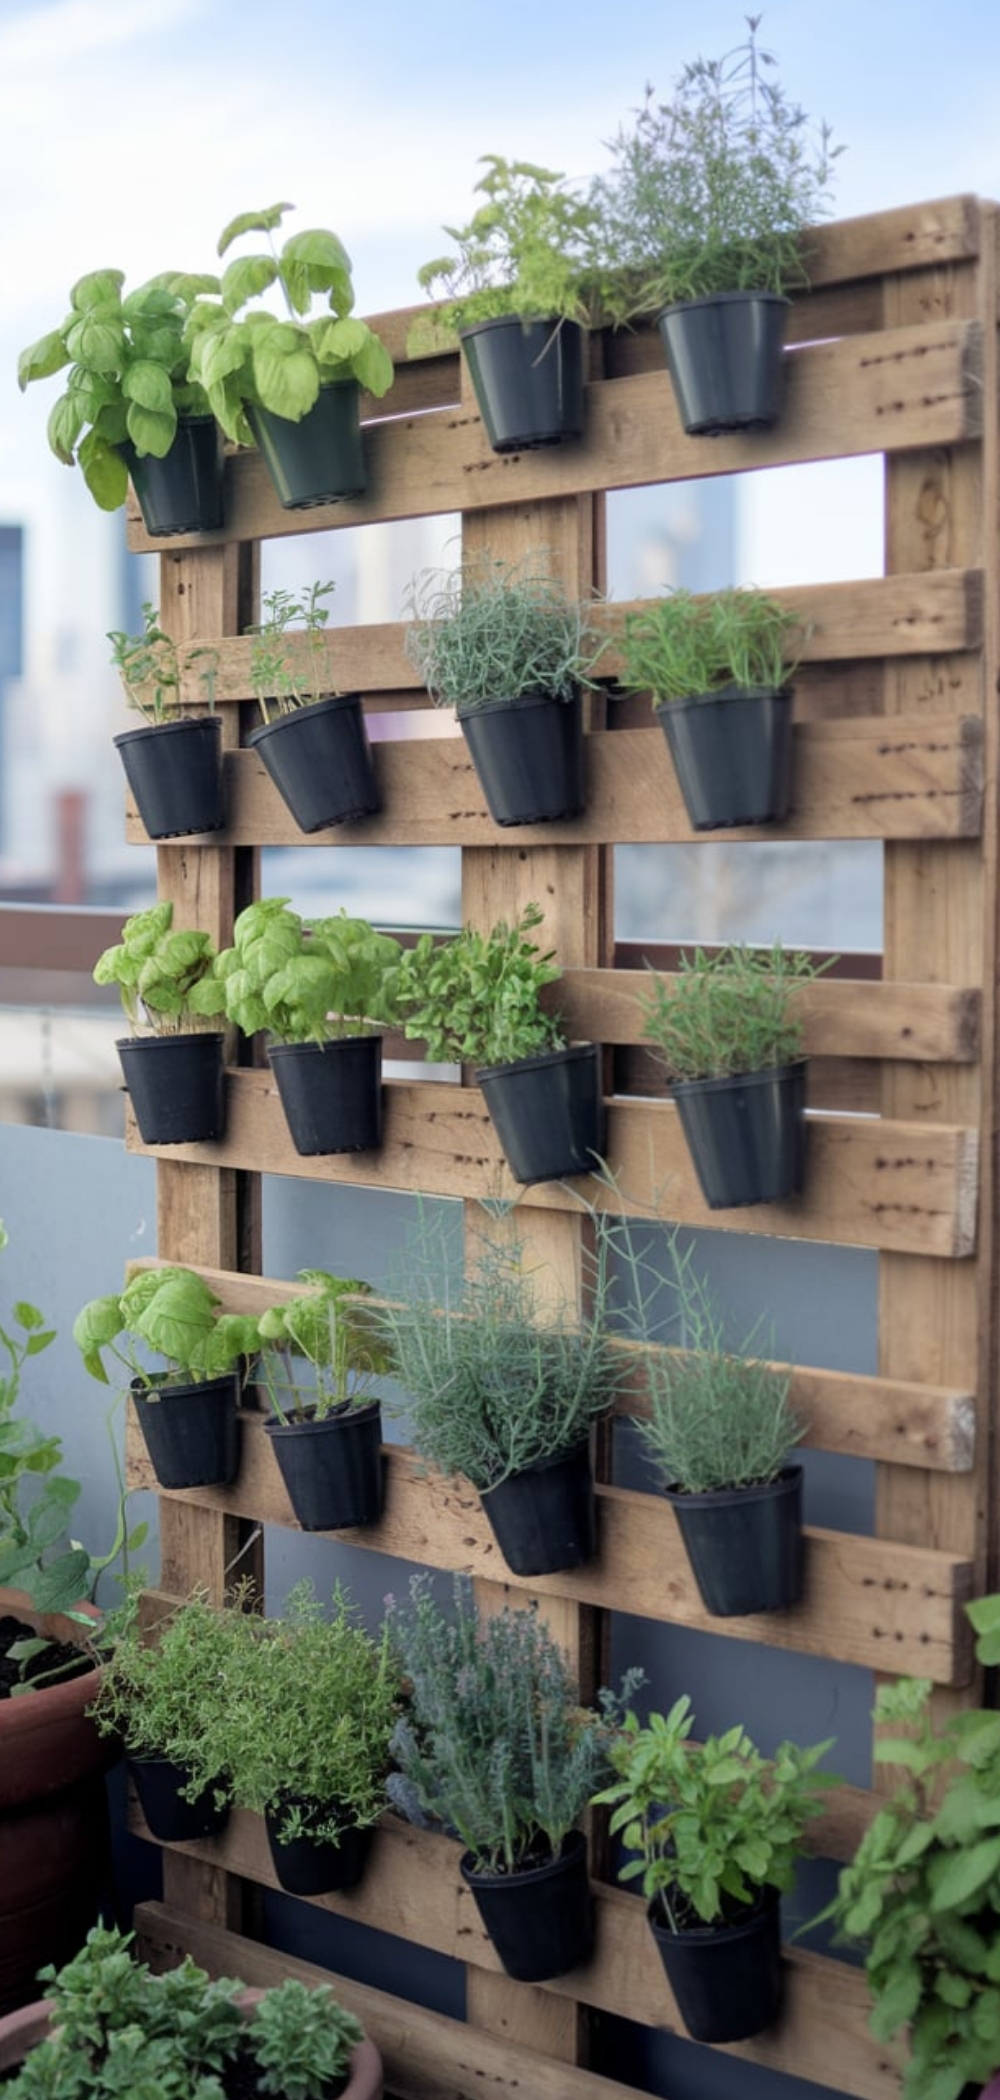
Craft a small vertical herb garden using an old pallet, perfect for balconies and patios.
Materials Needed:
- One wooden pallet
- Landscape fabric
- Staple gun
- Potting soil
- Herb plants (basil, mint, thyme, etc.)
Instructions:
- Prepare the Pallet: Sand and clean the pallet.
- Create Planting Pockets: Attach landscape fabric across the back and bottom of the pallet sections to hold soil.
- Fill with Soil: Pour potting soil into each pocket.
- Plant Herbs: Insert herb plants into each slot and press soil firmly around roots.
- Position & Water: Place the pallet vertically and water regularly.
Tip: Label each herb with small wooden signs for easy identification.
8. Pallet Projects: Shoe Rack
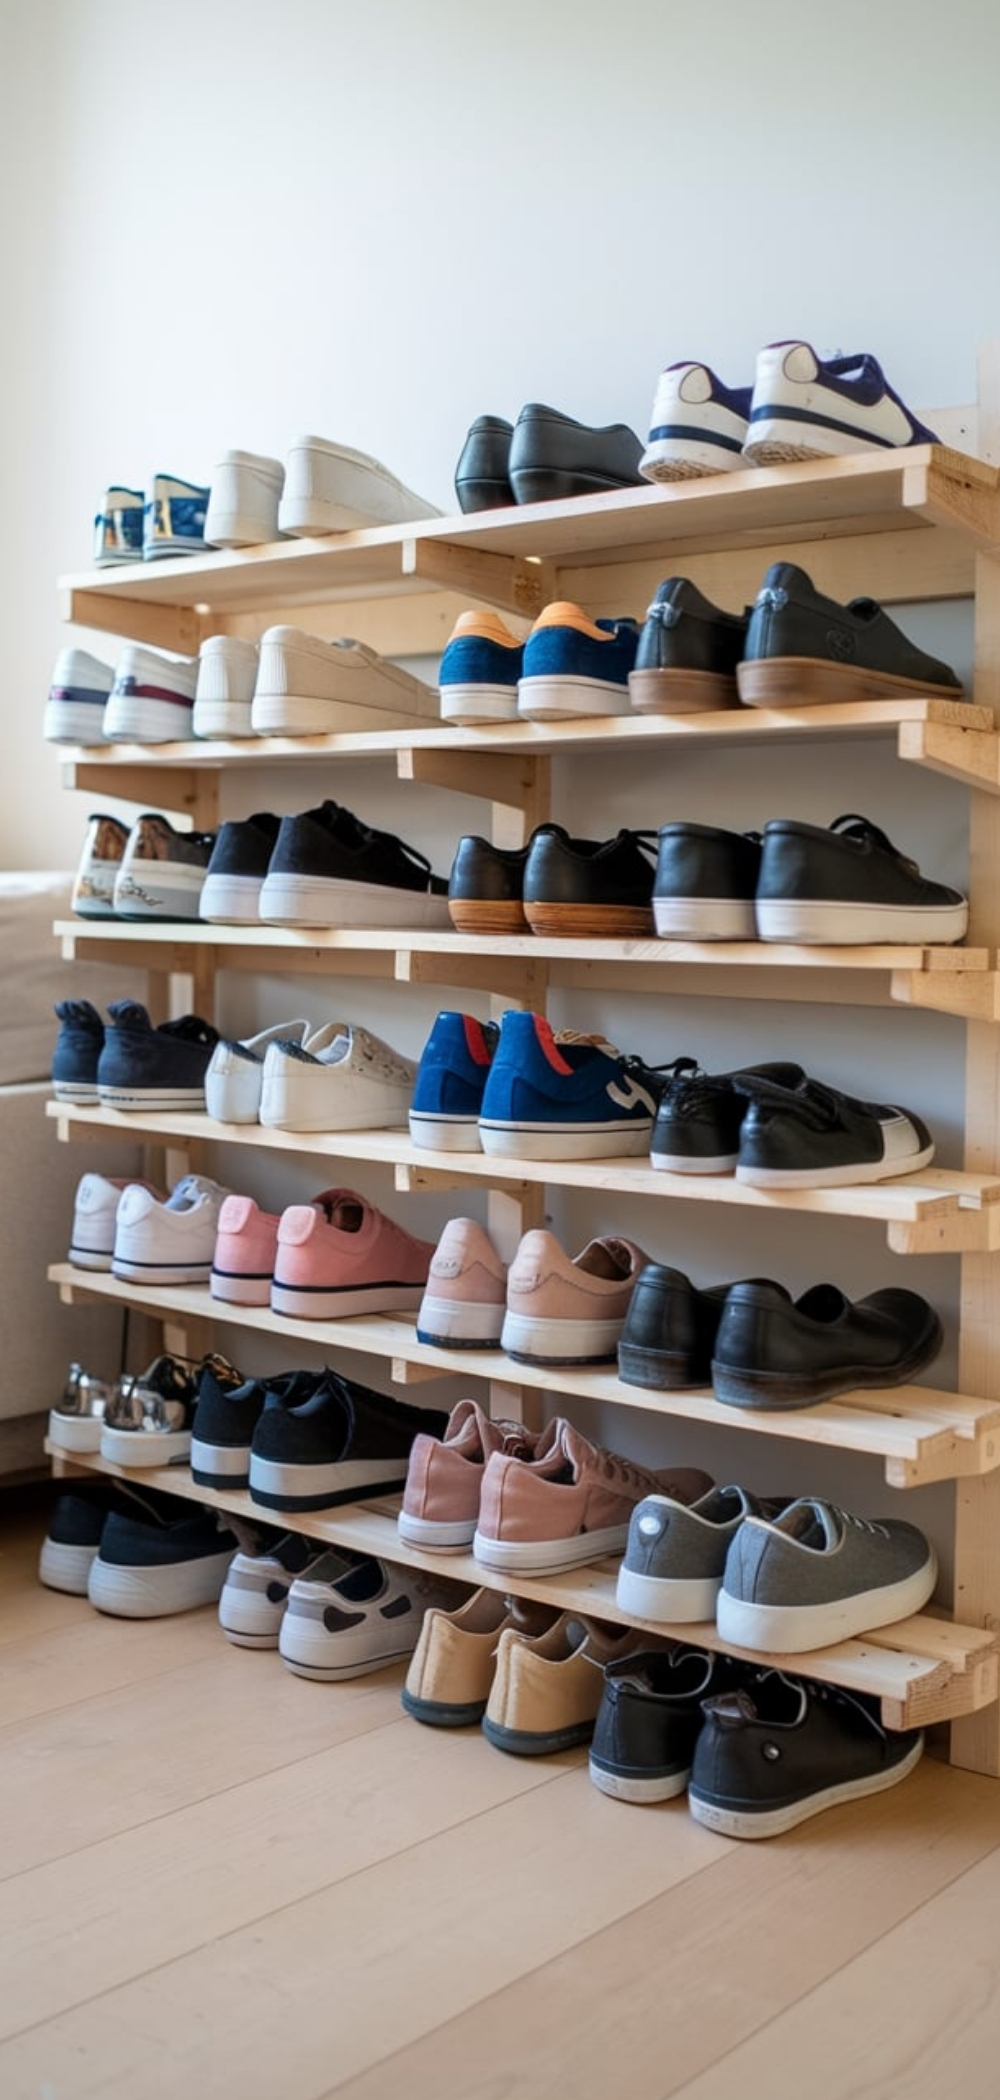
Organize shoes neatly with a simple pallet rack.
Materials Needed:
- One wooden pallet
- Sandpaper
- Wood screws
- Wall brackets (optional)
Instructions:
- Sand the pallet thoroughly.
- Position it vertically against a wall.
- Secure it with screws or brackets.
- Place shoes between the pallet slats for easy storage.
Tip: Paint or stain the pallet for a more polished look.
7. Pallet Projects: Kitchen Island
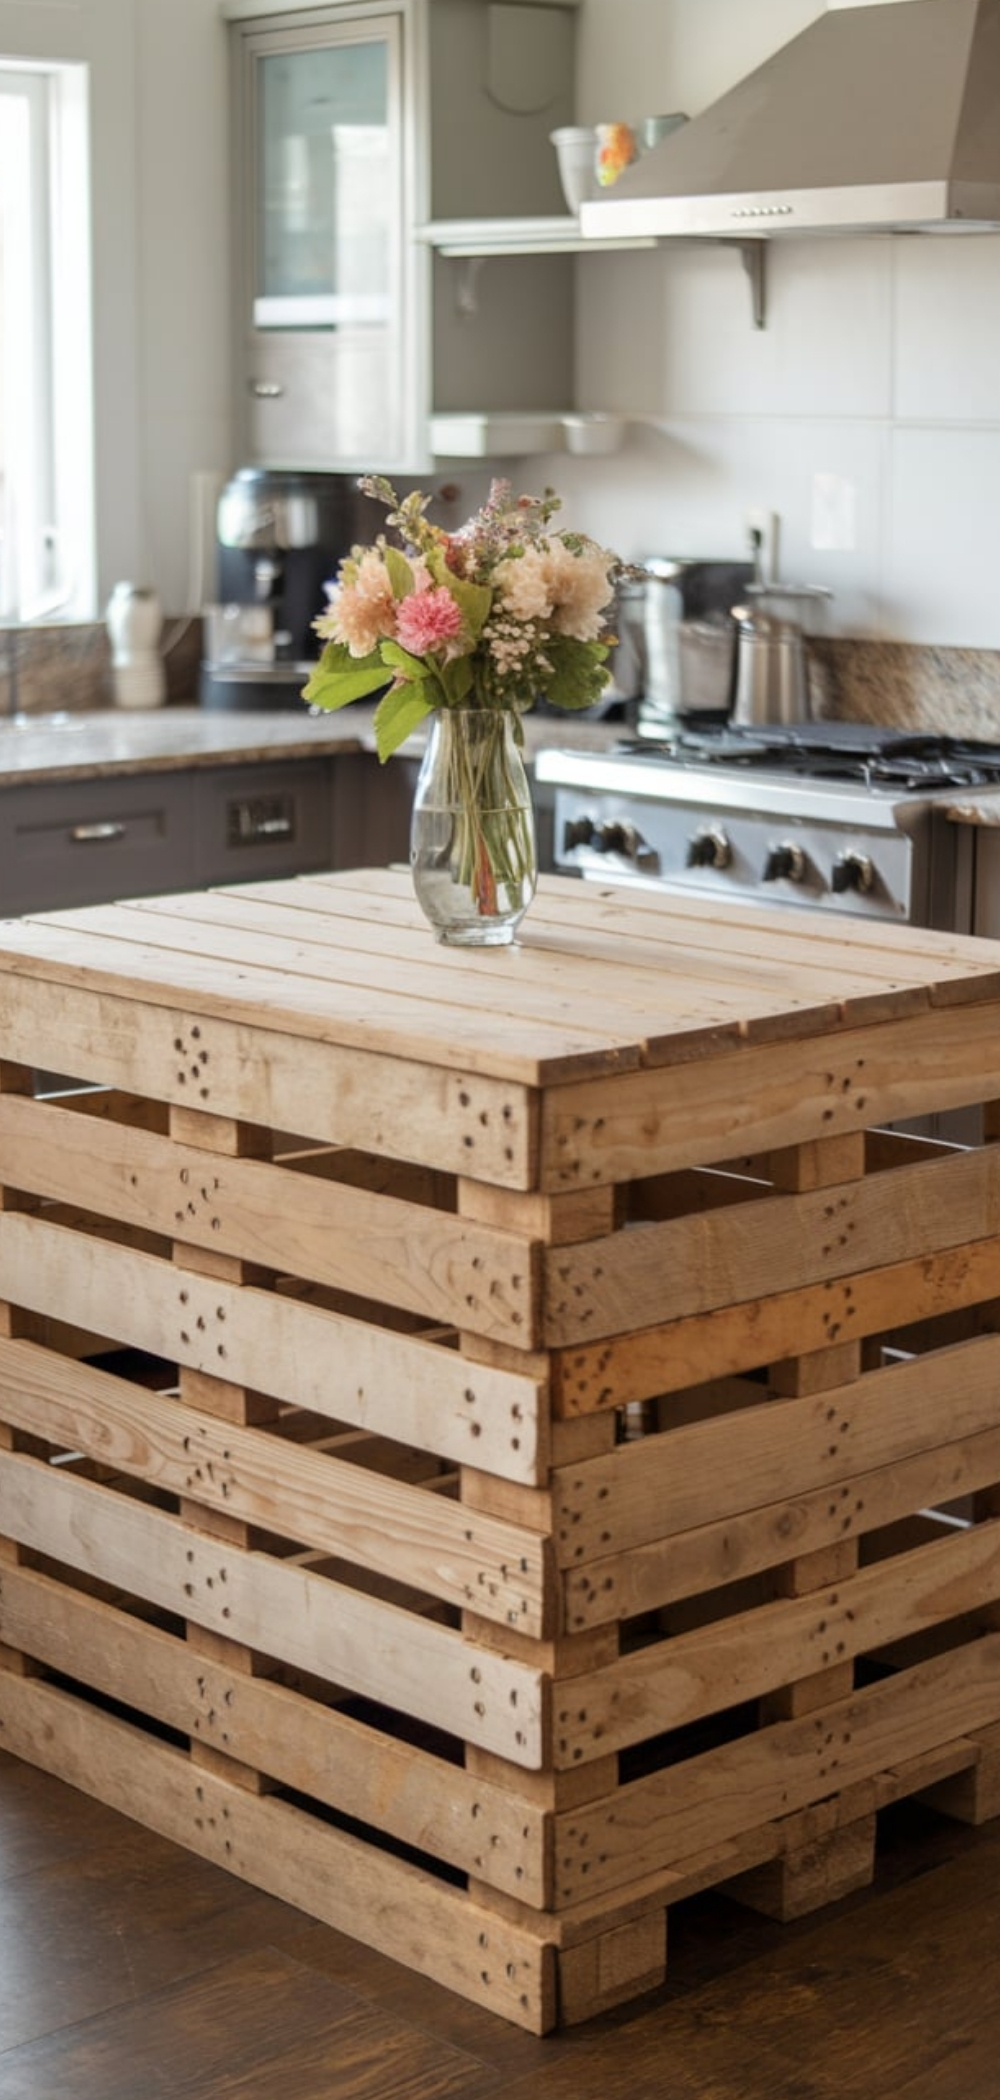
A pallet-based kitchen island provides extra counter space with a rustic touch.
Materials Needed:
- Three to four wooden pallets
- Wood screws
- Sandpaper
- Countertop slab
- Wood stain or paint
Instructions:
- Create the Base: Stack two pallets horizontally and secure them with screws.
- Add Support: Attach additional planks for stability.
- Install Countertop: Place a wooden or marble slab on top and secure it.
- Finish with Paint or Stain.
Tip: Add wheels to make it mobile.
6. Pallet Projects: Bed Frame
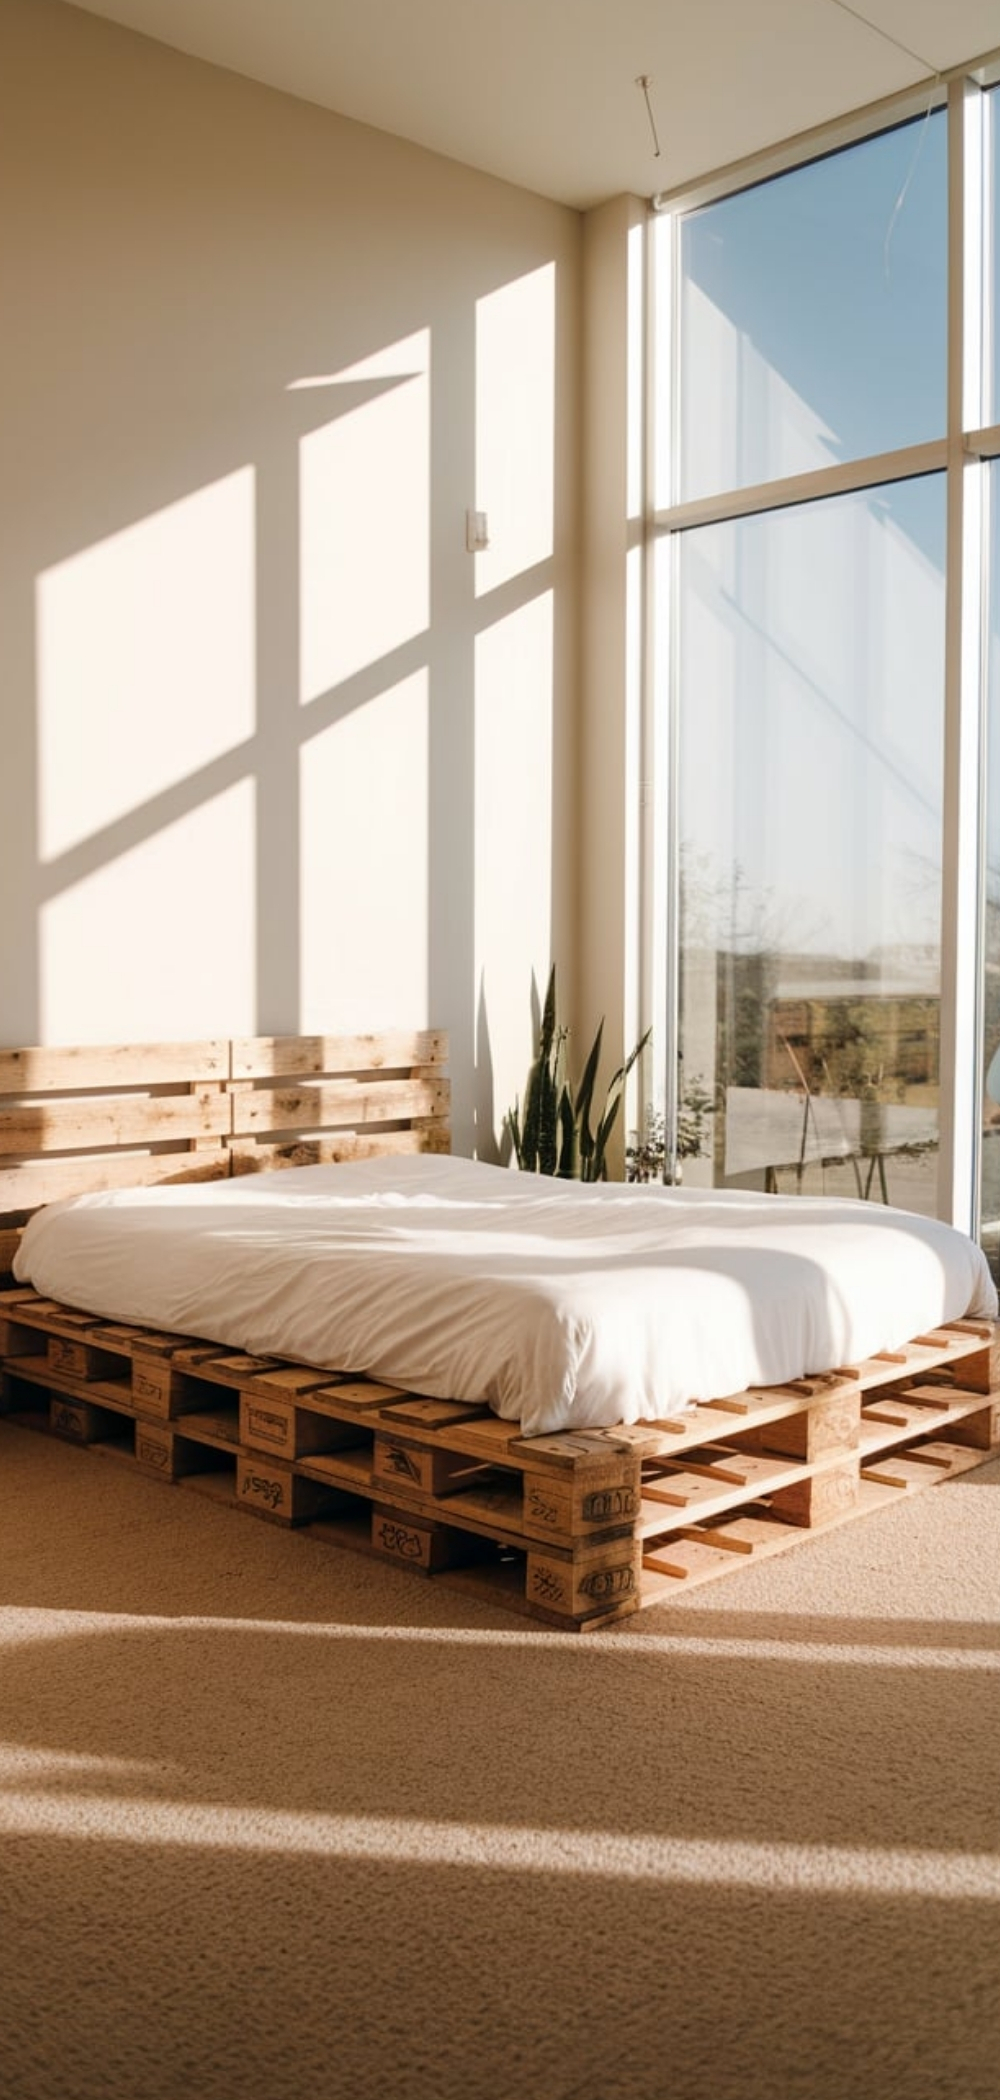
A pallet bed frame adds a rustic, minimalist touch to any bedroom.
Materials Needed:
- Four to six wooden pallets (depending on bed size)
- Sandpaper
- Wood screws
- Drill
- Wood stain or paint (optional)
Instructions:
- Prepare the Pallets: Sand each pallet to remove rough edges and splinters.
- Arrange the Base: Lay out the pallets in a rectangle to match your mattress size.
- Secure the Structure: Attach the pallets together using wood screws and a drill.
- Add Support (Optional): Reinforce the center with additional wooden planks for stability.
- Finishing Touches: Apply stain or paint to match your bedroom décor.
- Place the Mattress: Lay your mattress on top of the pallet frame, and enjoy your new bed!
Tip: Add LED strip lights underneath for a modern, ambient effect.
5. Pallet Projects: Dog Bed
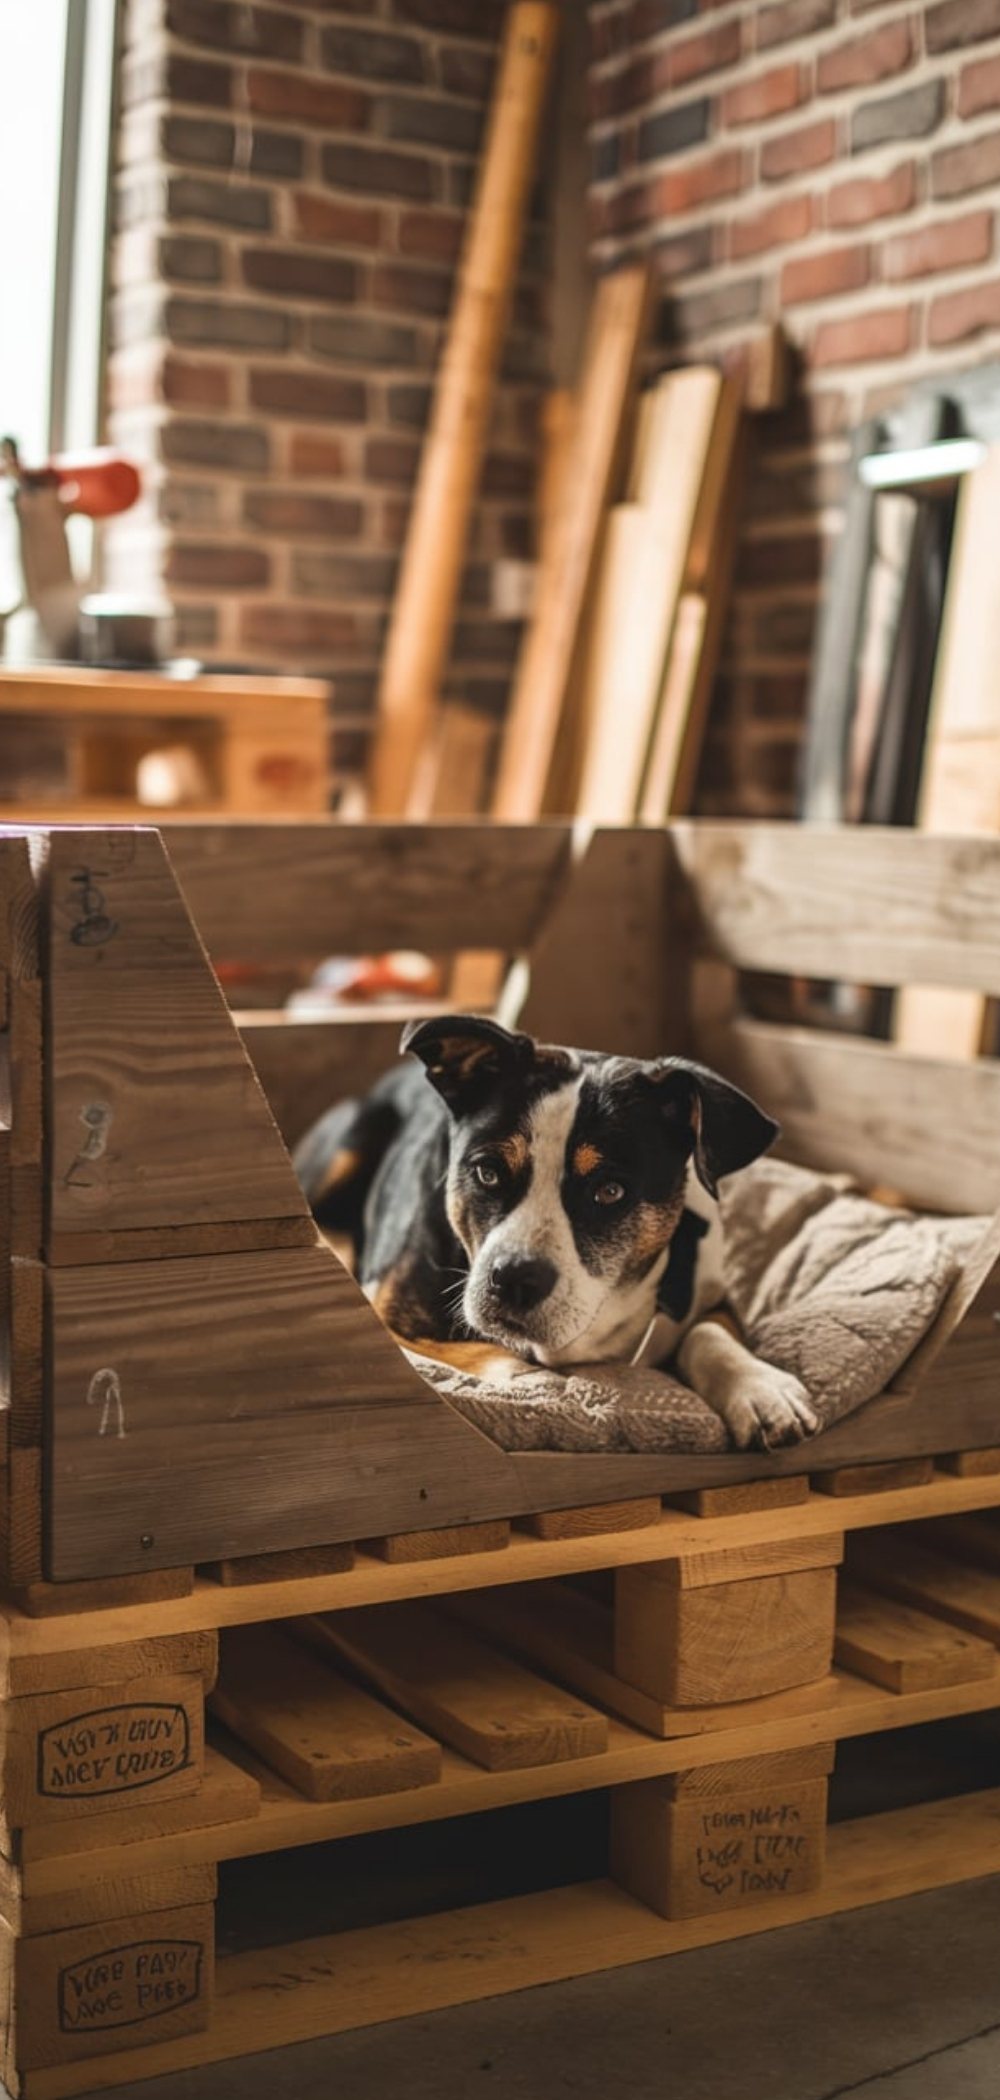
Give your furry friend a cozy bed using a recycled pallet.
Materials Needed:
- One wooden pallet
- Sandpaper
- Wood screws
- Saw
- Paint or stain
- A soft cushion or dog mattress
Instructions:
- Sand the pallet thoroughly to remove rough edges.
- Cut the pallet to create a rectangular or square base.
- Add Side Walls: Use additional pallet wood to create a three-sided enclosure. Secure them with wood screws.
- Paint or stain the bed for a finished look.
- Add a soft cushion for comfort.
Tip: Personalize it with your dog’s name using stencils and paint.
4. Pallet Projects: TV Stand

A sturdy TV stand with built-in storage from pallets.
Materials Needed:
- Two to three wooden pallets
- Sandpaper
- Wood screws
- Saw
- Paint or wood stain
- Brackets (optional for wall-mounting)
Instructions:
- Cut the pallets into sections for the top surface, shelves, and sides.
- Assemble the structure by attaching pallets together using wood screws.
- Sand thoroughly to smooth all surfaces.
- Add finishing touches with stain or paint.
- Mount or place your TV on top and organize media devices below.
Tip: Add wheels for mobility.
3. Pallet Projects: Work Desk
A stylish and functional home office desk.
Materials Needed:
- Two wooden pallets
- Sandpaper
- Saw
- Drill & wood screws
- Table legs or cinder blocks
- Paint or stain
Instructions:
- Cut the pallets to create a flat tabletop.
- Sand the wood to smooth all surfaces.
- Attach table legs or cinder blocks as supports.
- Secure everything together with screws.
- Paint or stain to match your office decor.
Tip: Install a pull-out keyboard tray for extra convenience.
2. Pallet Projects: Planter Box
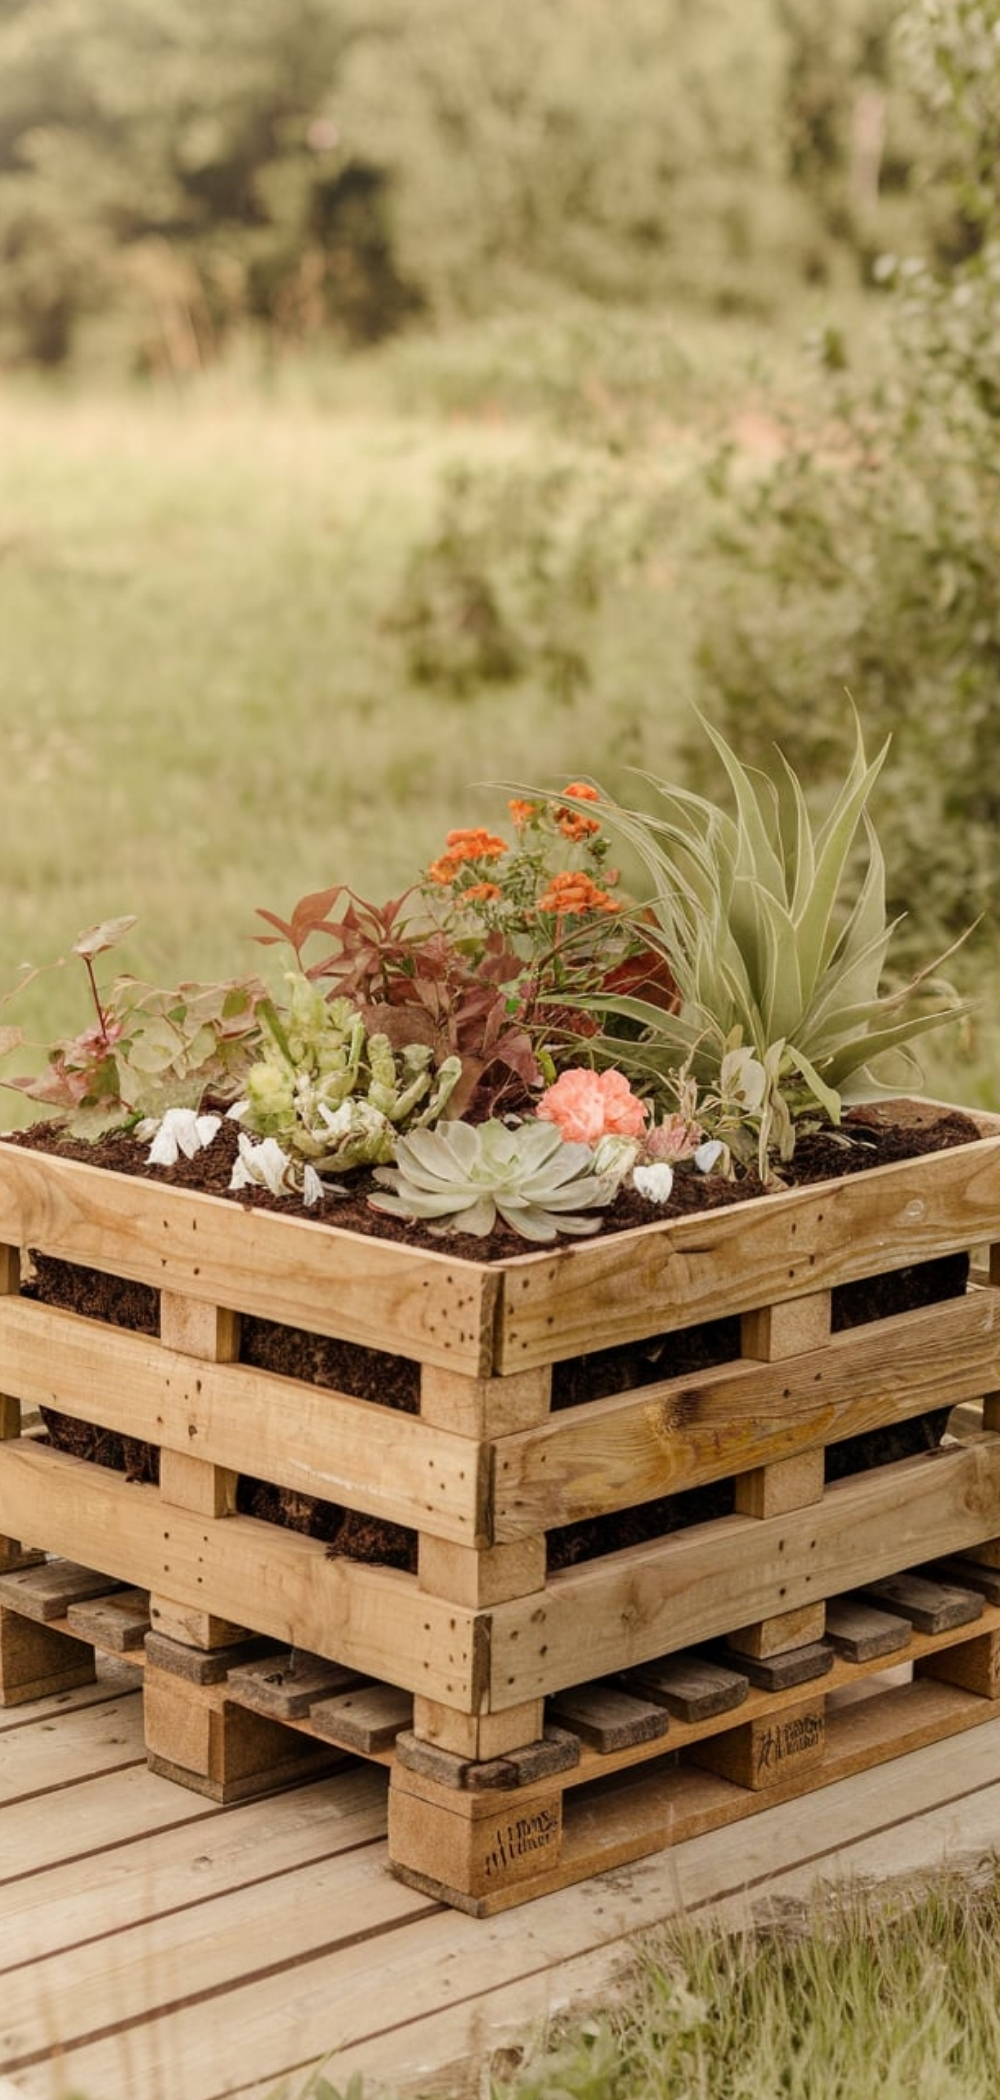
A charming and practical solution for gardening.
Materials Needed:
- One wooden pallet
- Saw
- Sandpaper
- Wood screws
- Landscape fabric
- Potting soil
- Plants
Instructions:
- Cut the pallet into sections to create a box shape.
- Assemble the structure by securing the panels with screws.
- Sand and finish with paint or stain.
- Line the interior with landscape fabric to hold soil.
- Fill with soil and plant flowers, herbs, or vegetables.
Tip: Use multiple pallet planters to create a vertical garden.
1. Pallet Projects: Wall Art
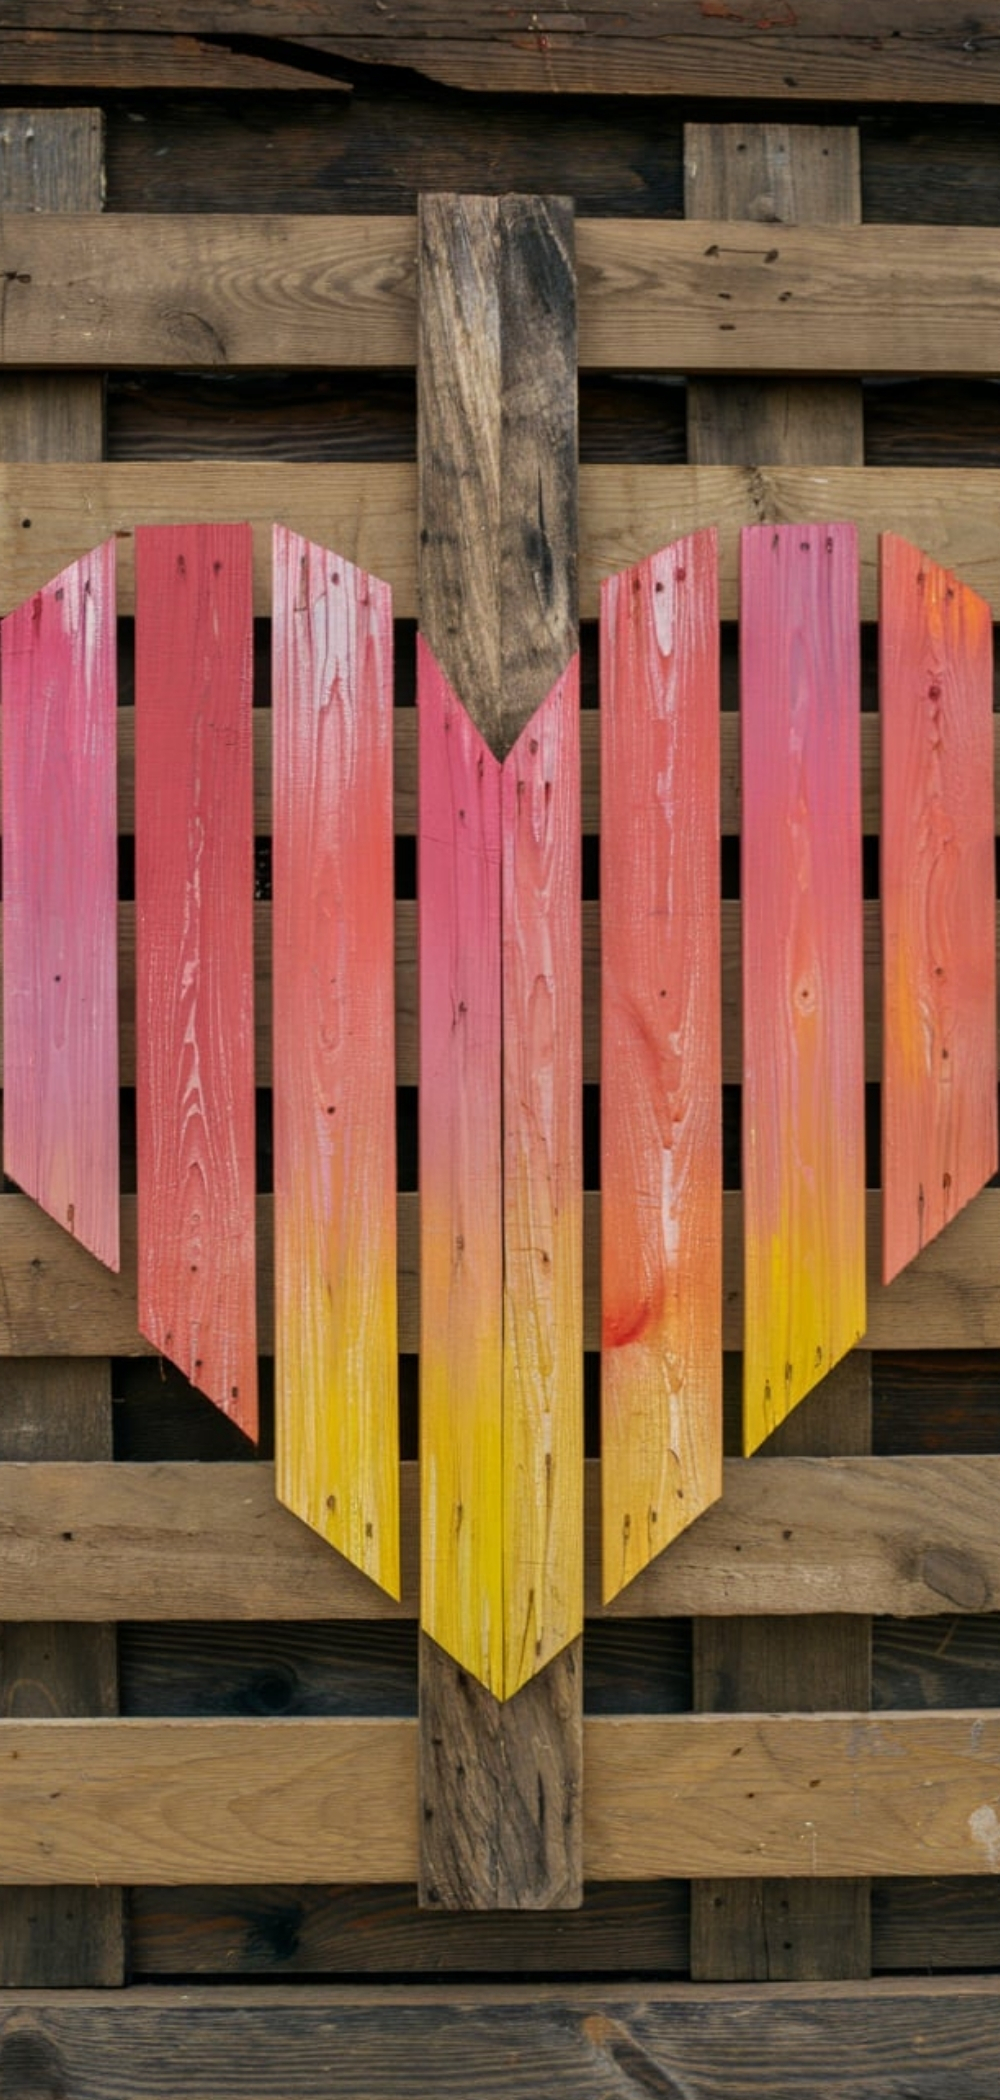
Transform old pallets into a decorative wooden art piece.
Materials Needed:
- Wooden pallet planks
- Sandpaper
- Paint or wood stain
- Stencils or decals
- Hanging brackets
Instructions:
- Disassemble the pallet to get individual planks.
- Sand and arrange them into your desired design.
- Paint, stain, or stencil a custom design onto the wood.
- Secure the planks together using nails or adhesive.
- Attach hanging brackets and mount it on the wall.
Tip: Add string lights for a warm, rustic glow.
Conclusion
Turn simple wooden pallets into stunning and functional pieces with these DIY project ideas! From furniture to home decor, pallets offer endless creative possibilities. Grab your tools and start crafting something unique today!