
Make sure to join my list for Weekly Tips and Recipes to Your Inbox
Small Retaining Wall Ideas That Made Our Sloped Backyard Finally Make Sense

A little note: Some images in this post may come from third-party sources and are shared purely to inspire you. All credit goes to their original creators. Visit our Image Credits Policy for more information.
I stood at the top of our sloped backyard on a Saturday morning, watching mulch wash down toward the patio again after one hard rain. A retaining wall felt like the only real fix, but I had no idea where to even begin.
I had been patching that slope for two summers with whatever I could find. Extra bricks, leftover landscape timbers, a row of rocks that never quite held. Nothing lasted through a full season.
I finally admitted the problem was bigger than a weekend fix. Water kept finding the same low spot, and the kids kept sliding down the hill on their bikes anyway. Something had to actually hold the ground in place.
I started looking at real yards instead of catalog photos, the kind with a garden hose still lying in the dirt. A retaining wall built by an actual family looked nothing like the polished versions I had been saving. That honesty is what finally got me to try.
I noticed the walls that held up over time were rarely the fanciest ones. They were simple, sturdy, and built to fit the slope they were given instead of fighting against it. That lesson mattered more than any style choice.
I tried a version of this on our own hill that fall. It was not perfect the first weekend, but it held, and that alone felt like a win after two years of losing the same battle.
What surprised me most was how much a retaining wall changes the way a yard actually gets used. Once the ground stopped shifting, we started planting things there again, sitting near it, letting the kids play closer to the edge without worry.
I kept a running list of every wall idea that made me stop scrolling, the kind I would genuinely send to a friend fighting her own slope. Every idea below came from that list, tested against our own messy, sloped, very real backyard. These are the ones that finally worked.
What We're Exploring
- 01 Stacked Natural Stone Turns A Slope Into A Garden Bed
- 02 Boulder Terracing Softens A Steep Slope Naturally
- 03 A Curved Block Wall Turns A Straight Slope Into Something Interesting
- 04 Tiered Light Stone Blocks Frame A Garden Bed Beautifully
- 05 A Multi-Level Block Wall Handles A Steep Grade Change
- 06 Built-In Steps Turn A Retaining Wall Into A Real Pathway
- 07 A Gabion Wall Gives Loose Stone A Real Purpose
- 08 A Brick Faced Wall Adds A Classic Finish To A Curved Bed
- 09 What A Retaining Wall Actually Teaches You About Your Own Yard
- 10 The Mega Mom Moment
Stacked Natural Stone Turns A Slope Into A Garden Bed
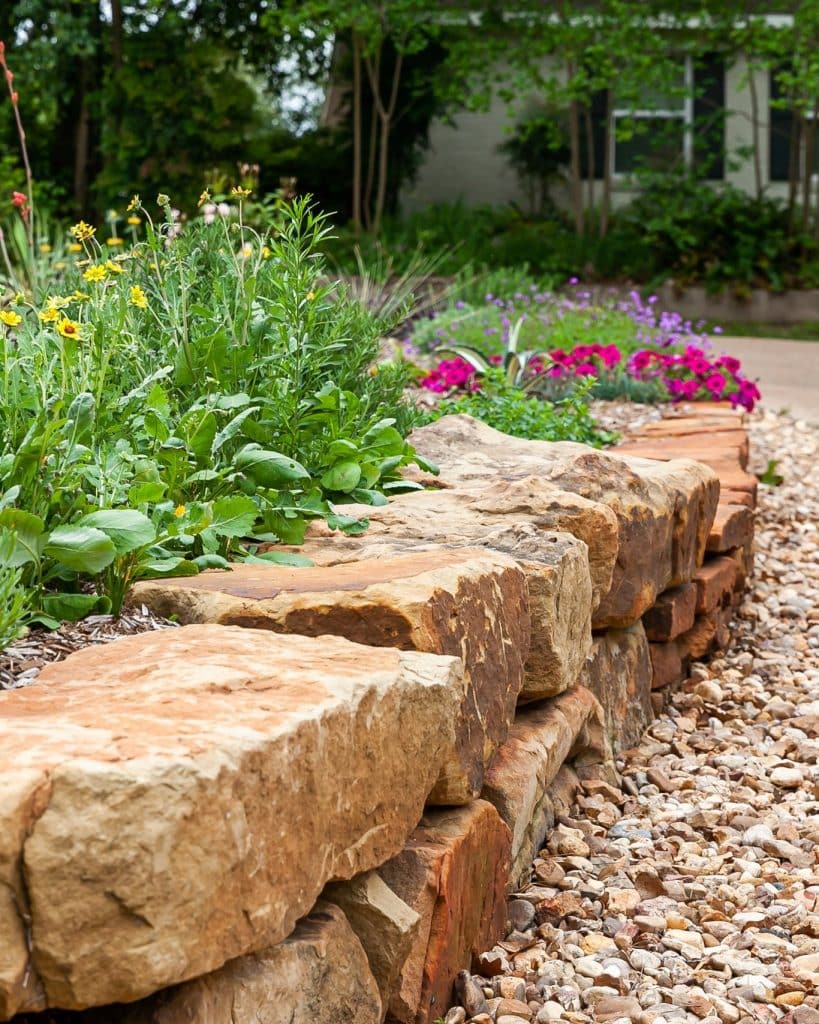
Stacking flat, irregular stone slabs along the edge of a raised bed is one of the most forgiving ways to build a retaining wall without needing perfect masonry skills. The natural variation in each stone hides small gaps and uneven edges instead of exposing them. That imperfection is actually what makes the finished wall feel intentional.
Choosing stones with a flat top surface, a detail often highlighted in outdoor design coverage on BHG.com, gives the wall a usable ledge for setting down a drink or a garden trowel. That small functional detail makes the wall feel like more than decoration.
Budget Guide: Natural stone slabs for a low wall typically run $8 to $20 per stone depending on size. You can find good options at a local landscape supply yard, Home Depot, or through a stone retailer near you. Buying stones in person lets you match shapes for a tighter fit.
Boulder Terracing Softens A Steep Slope Naturally
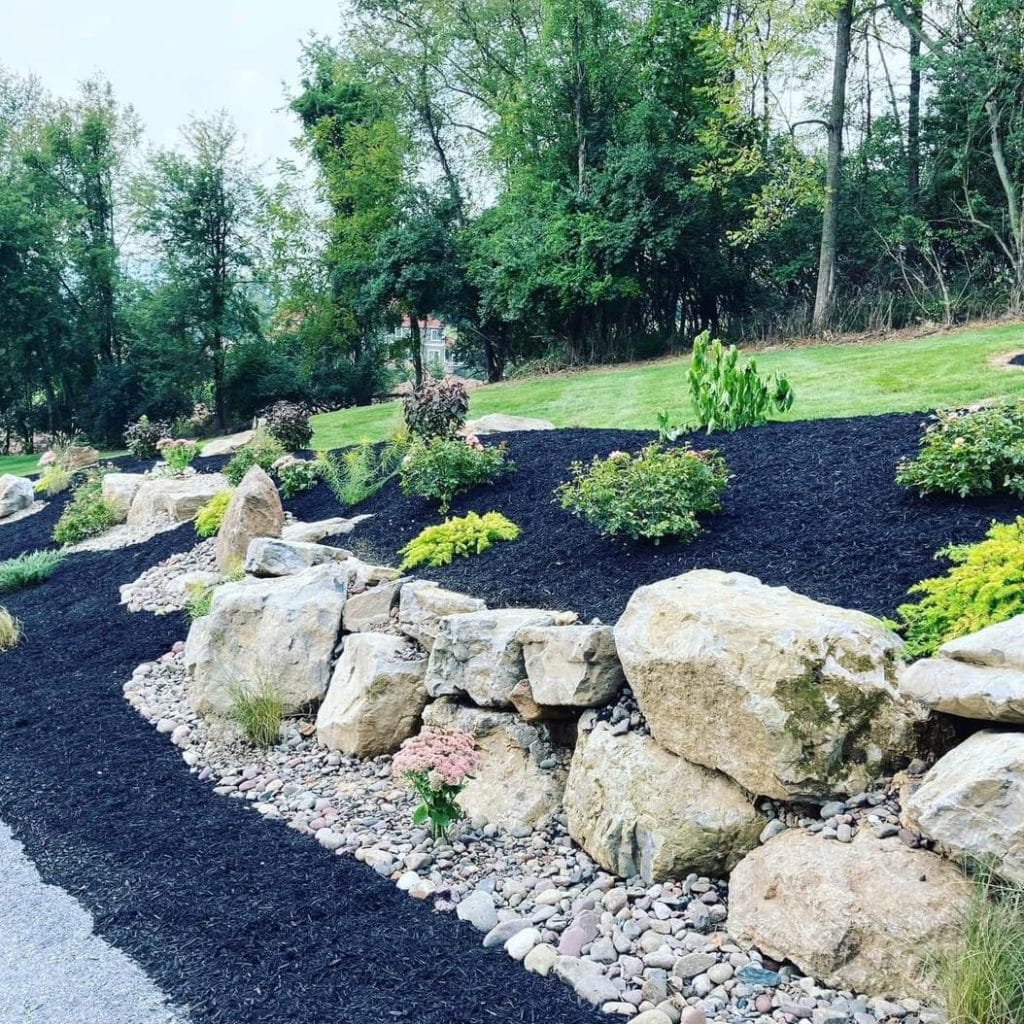
Using large, rounded boulders instead of cut stone or block is one of the most low-maintenance ways to build a retaining wall on a steeper slope. The boulders themselves do most of the structural work, so there is far less concern about erosion undermining the wall over time. That stability matters most on a hill kids actually play near.
Grouping boulders of varying sizes rather than uniform rocks, a layout style frequently recommended by landscape designers featured on HGTV.com, keeps the terracing from looking too engineered. That natural irregularity is exactly what makes a boulder wall feel like part of the land instead of added on top of it.
Budget Guide: Large landscape boulders typically cost $100 to $300 each depending on size, and are available through local quarries, landscape supply yards, or specialty stone retailers. Delivery fees often apply for boulders this size, so ask about that upfront.
A Curved Block Wall Turns A Straight Slope Into Something Interesting
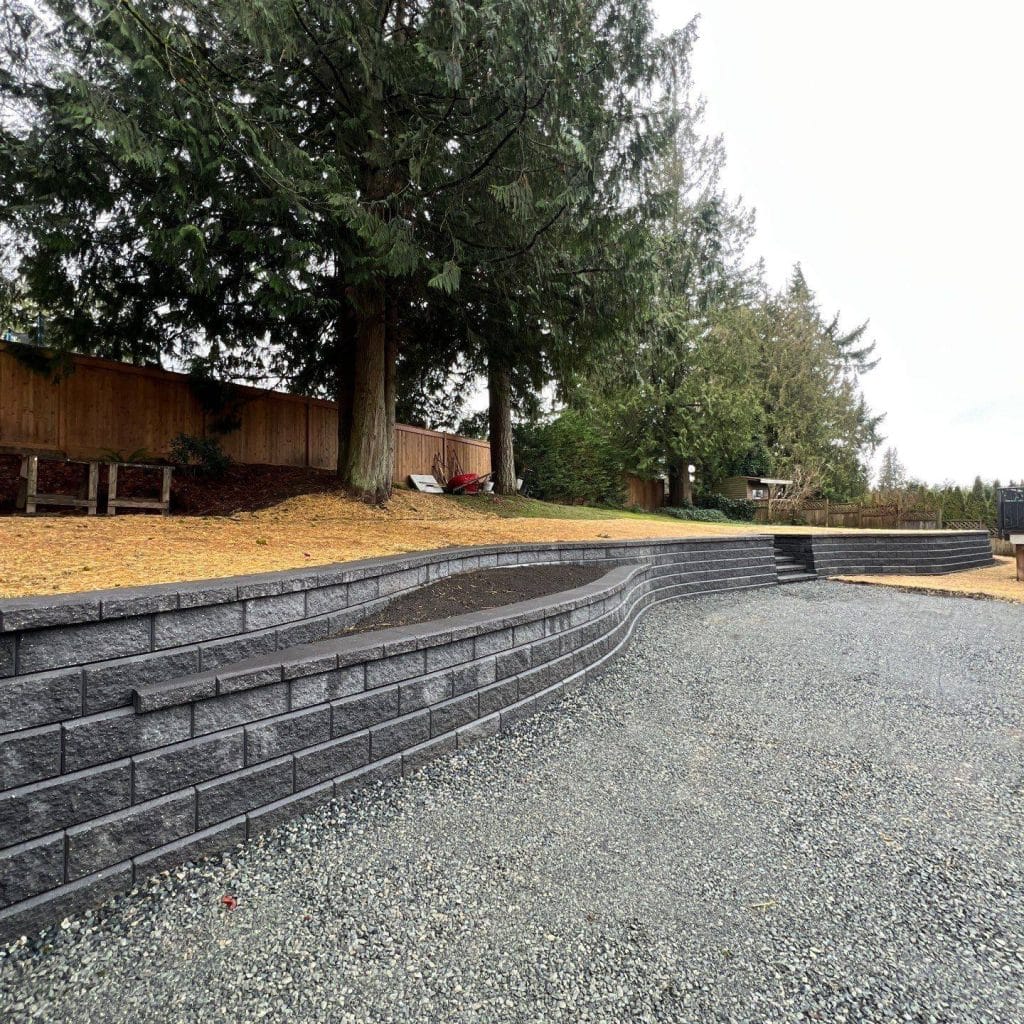
Building a retaining wall with a gentle curve instead of a straight line does more than just hold back soil; it gives an otherwise plain driveway edge real visual interest. The sweeping shape softens the whole approach to a house in a way a straight edge never could. It is a small design choice that changes how the entire space feels.
Using interlocking concrete blocks designed specifically for curves, a product category often covered in outdoor renovation guides on FamilyHandyman.com, makes this style far more achievable for a DIY minded family than cutting stone to match a curve. The blocks are built to follow the bend without extra cutting.
Budget Guide: Curved retaining wall block systems typically run $4 to $9 per block depending on style and finish. You can find good options at Home Depot, Lowe’s, or a local masonry supply store. Buying a few extra blocks for future repairs is worth the small added cost.
Tiered Light Stone Blocks Frame A Garden Bed Beautifully
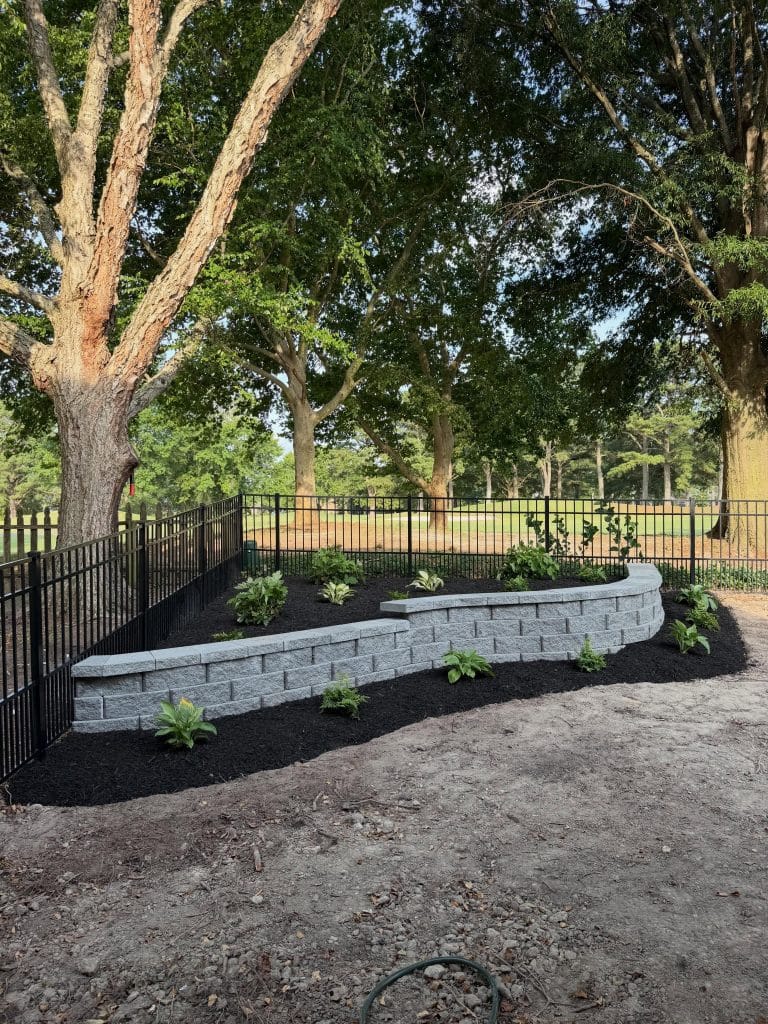
Building a retaining wall in two gently stepped tiers instead of one tall wall creates a planting shelf partway up the slope, giving you more usable garden space instead of one flat drop. That extra tier means more room for flowers, ferns, or hostas without needing to terrace the entire yard. It solves a height problem and a planting problem at the same time.
Choosing a light colored block that contrasts against dark mulch, a pairing often shown in outdoor styling content on GoodHousekeeping.com, keeps the wall from disappearing visually against the greenery around it. That contrast makes the whole bed read as designed rather than incidental.
Budget Guide: Tiered retaining wall block kits typically range from $150 to $400 depending on the length and number of tiers. You can find good options at Home Depot, Lowe’s, or a local landscape supply company. Renting a masonry saw for cuts is often cheaper than buying one outright.
A Multi-Level Block Wall Handles A Steep Grade Change
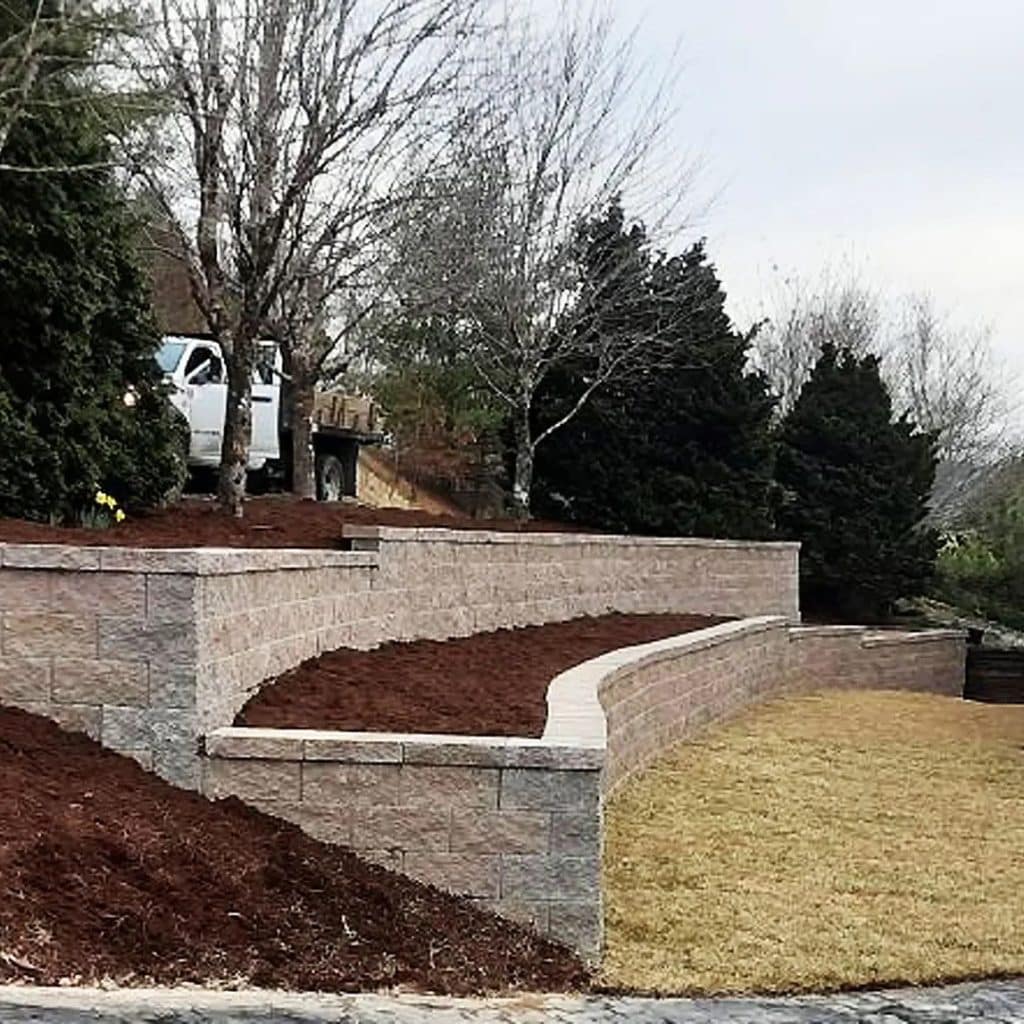
When a slope drops dramatically instead of gently, stacking several shorter walls instead of one tall structure is a much safer approach to a retaining wall. Each level holds back less soil individually, which reduces the pressure on any single wall and keeps the whole system more stable long-term. It is the kind of decision that genuinely matters for a hillside near where kids play.
Consulting with a landscaping professional before beginning a multi-level project, guidance often echoed in home renovation advice on TheSpruce.com, matters more here than with a smaller wall since drainage and structural load become genuine safety concerns. This is one project where a little expert input is worth the cost.
Budget Guide: Multi-level retaining wall projects typically range from $2,000 to $8,000 or more depending on height, length, and materials. Professional installation is strongly recommended for walls over three feet, and many landscape companies offer free estimates to help you plan.
Built-In Steps Turn A Retaining Wall Into A Real Pathway
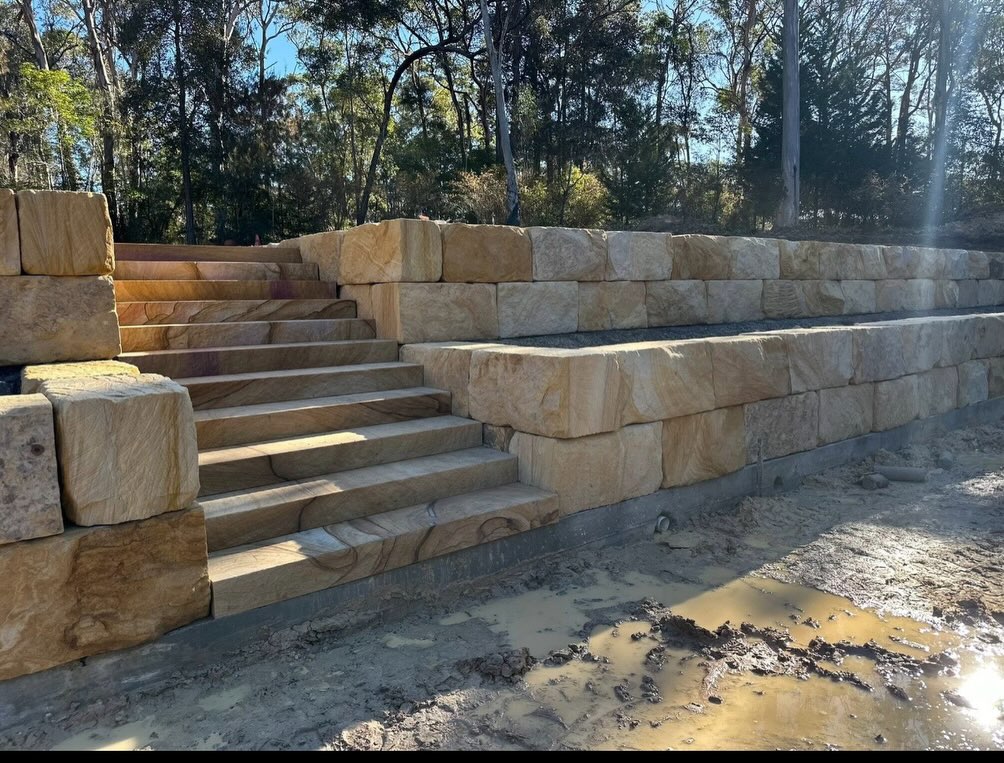
Cutting a set of stairs directly into a retaining wall rather than adding a separate staircase nearby keeps a sloped yard feeling like one connected space instead of two awkward levels. The steps become part of the wall’s structure, which gives the whole hillside a cleaner, more finished look. It also solves the very practical problem of actually getting up and down the slope safely.
Using the same stone thickness for both the steps and the wall face, a detail commonly noted in hardscape design coverage on ApartmentTherapy.com, keeps the whole structure looking like it was planned as one project. That consistency is what separates a professional-feeling result from a patched-together one.
Budget Guide: Cut stone steps integrated into a retaining wall typically add $500 to $1,500 to the overall project cost depending on the number of steps and stone type. Local stone suppliers or landscaping contractors can provide accurate quotes based on your specific slope.
A Gabion Wall Gives Loose Stone A Real Purpose
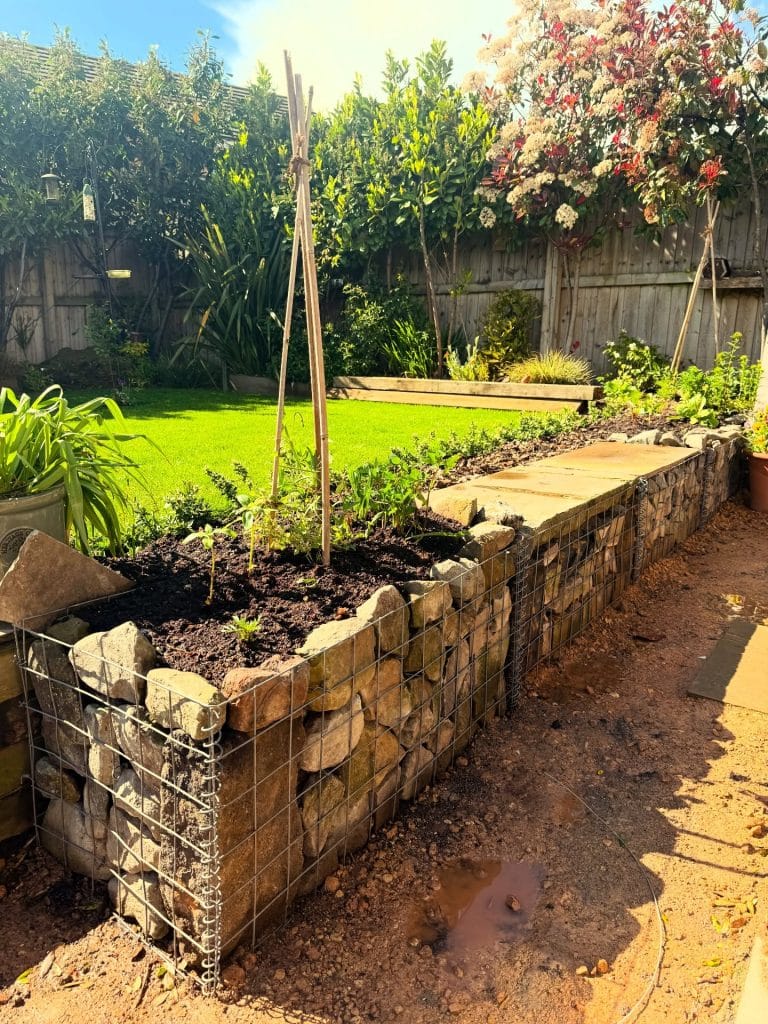
Packing loose stone into a galvanized wire cage is one of the most budget-friendly ways to build a retaining wall, especially if you already have rocks sitting around the property. The wire frame does the structural holding, so you do not need mortar or professional masonry skills to get a sturdy result. It is a project a determined parent can genuinely tackle over a weekend.
Using uniform-sized stones near the visible face and mixed rubble in the center, a packing technique often mentioned in DIY landscaping guides on FamilyHandyman.com, keeps the finished wall looking tidy from the outside while saving material where it will not be seen. That trick stretches your stone supply much further.
Budget Guide: Galvanized welded wire mesh panels for gabion walls typically cost $30 to $70 per panel, and are available at Home Depot, Tractor Supply, or specialty fencing suppliers. Using stone already on your property can cut the total project cost significantly.
A Brick Faced Wall Adds A Classic Finish To A Curved Bed
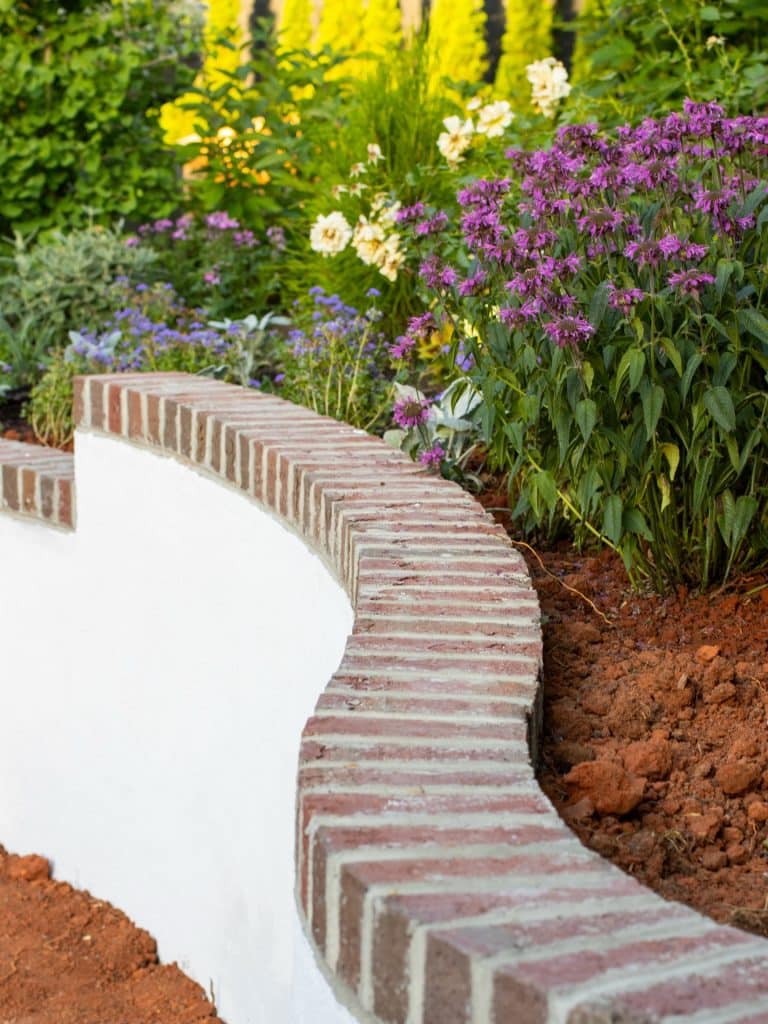
Facing a retaining wall with a single row of brick along the top edge is a small detail that gives an otherwise plain stucco or concrete wall a genuinely classic, finished look. The brick cap catches the eye without requiring the entire structure to be built from brick. That contrast between smooth and textured surfaces is quietly effective.
Choosing a brick that closely matches the tone of the home’s existing brick, a coordination tip often shared in exterior design content on RealSimple.com, ties the wall visually back to the house itself. That connection makes the wall feel like it was part of the original build rather than an afterthought.
Budget Guide: Brick capping for a curved retaining wall typically costs $6 to $15 per linear foot depending on brick style and labor. You can find brick supplies at Home Depot, a local masonry yard, or through a landscaping contractor for full installation.
What A Retaining Wall Actually Teaches You About Your Own Yard
Building a retaining wall forces you to actually understand how water moves through your property, which is something most of us never think about until a slope starts failing. Watching where mulch washes and where puddles collect after a storm becomes genuinely useful information. That knowledge changes how you plan everything else in the yard afterward.
Part of what makes this project worth the effort is how much it changes daily life around the house, not just how the yard looks. A stable retaining wall means kids can play closer to a slope without a parent watching every second. That peace of mind is honestly worth more than any curb appeal boost.
The Mega Mom Moment
I used to think fixing our slope meant doing everything myself to save money. What actually saved our backyard was admitting a taller **retaining wall** needed a professional, and putting my own energy into the planting instead. Knowing which part of a project is yours to do, and which part is not, is its own kind of skill.
This is also one of those projects that teaches patience in a very concrete way. A retaining wall built too quickly, without proper drainage or a solid base, tends to fail within a year or two no matter how good the stone looks on day one. Taking the extra time upfront always pays off later.
For a family already stretched thin on weekends, a retaining wall is a rare project where hiring help for the structural parts and doing the planting yourself feels like a genuinely reasonable split. You do not have to do everything by hand to feel proud of the result.
Enjoyed this post?
Share the love with another mom!
Every share helps this little blog grow — thank you so much